Mains voltage (230 V) — can kill. The low-voltage side (board, sensors, display, relay module) is safe to build yourself. The mains side must be wired by a licensed electrician, and tested with the circuit switched off at the MCB.
- Never switch a motor with a relay module. Motors pull several times their running current at start-up; hobby relay contacts weld or overheat. The relay only drives a contactor’s coil (or your pump starter’s coil input).
- Contactor rated for motors (AC-3) at or above the load’s nameplate current.
- Protect and earth: MCB on live, RCCB/ELCB on the circuit, metal bodies earthed. Switch live only — never neutral or earth.
- Keep the two worlds apart: mains and low-voltage wiring in separate compartments of a closed, non-metallic enclosure; no bare 230 V terminals.
- Fail safe: the code switches the load off when a sensor stops answering. Still fit a manual override at the starter.
Parts list
| Part | Qty | Approx. | Buy |
|---|---|---|---|
| ESP32 DevKit V1 (30-pin) | 1 | ₹380 | Buy ESP32 DevKit V1 (30-pin) |
| TTP223 capacitive touch module | 2 | ₹80 | Buy TTP223 capacitive touch module |
| 1-channel relay module, 5 V coil, 3.3 V-trigger (active-LOW) | 2 | ₹280 | Buy 1-channel relay module, 5 V coil, 3.3 V-trigger (active-LOW) |
| Isolated 5 V 1 A SMPS module (HLK-PM01 type), fitted by the electrician | 1 | ₹180 | Buy Isolated 5 V 1 A SMPS module (HLK-PM01 type), fitted by the electrician |
| 3 mm acrylic or glass front plate + a modular switch-box (6-module) | 1 | ₹300 | Buy 3 mm acrylic or glass front plate + a modular switch-box (6-module) |
| LED lamps (each ≤ 20 W) | 2 | ₹400 | Buy LED lamps (each ≤ 20 W) |
| Total | ₹1,620 |
Affiliate disclosure: “Buy” links may earn FlashReady a small commission at no extra cost to you. Prices are indicative.
Wiring
| ESP32 DevKit V1 | Part · pin | Wire | Notes |
|---|---|---|---|
| D32 | TTP223 capacitive touch module · I/O | yellow | Pad 1 — HIGH while touched |
| 3V3 | TTP223 capacitive touch module · VCC | red | |
| GND | TTP223 capacitive touch module · GND | black | |
| D33 | TTP223 capacitive touch module #2 · I/O | blue | Pad 2 |
| 3V3 | TTP223 capacitive touch module #2 · VCC | red | |
| GND | TTP223 capacitive touch module #2 · GND | black | |
| D26 | 1-channel relay module (5 V coil) · IN | orange | Lamp 1 relay, active-LOW; HIGH before it becomes an output |
| VIN | 1-channel relay module (5 V coil) · DC+ | red | |
| GND | 1-channel relay module (5 V coil) · DC− | black | |
| Lamp 1 circuit, 230 V (electrician) · L | 1-channel relay module (5 V coil) · COM | brown | Live from the MCB — 230 V, electrician only |
| Lamp 1 circuit, 230 V (electrician) · Lamp L | 1-channel relay module (5 V coil) · NO | brown | To lamp 1’s live; neutral and earth go straight to the lamp |
| D27 | 1-channel relay module (5 V coil) #2 · IN | orange | Lamp 2 relay |
| VIN | 1-channel relay module (5 V coil) #2 · DC+ | red | |
| GND | 1-channel relay module (5 V coil) #2 · DC− | black | |
| Lamp 2 circuit, 230 V (electrician) · L | 1-channel relay module (5 V coil) #2 · COM | brown | Live from the MCB — 230 V, electrician only |
| Lamp 2 circuit, 230 V (electrician) · Lamp L | 1-channel relay module (5 V coil) #2 · NO | brown | To lamp 2’s live |
Board quirks: Each relay switches one <strong>LED lamp of 20 W or less</strong> — well within a 10 A relay contact. Don’t put fans, ACs, geysers or motors on these relays; those need a contactor. The 230 V wiring, the SMPS module inside the switch box and the earth are an electrician’s job. A switch box mixes 230 V and 3.3 V in a small space. Keep the ESP32 and touch pads on one side of an insulating barrier and all mains wiring on the other, with no exposed 230 V anywhere the front plate can touch. The TTP223 senses through 2–3 mm of acrylic or glass. Stick the pads flat against the back of the front plate. They calibrate themselves at power-on — don’t touch them while the board starts. After a power cut the lamps start OFF. The phone page has no password, so it is only for your own Wi-Fi — don’t port-forward it.
Code
// Touch switch for two lamps, with a phone page — ESP32 DevKit V1 + 2x TTP223 + 2 relay modules
// TTP223 touch pads: I/O -> D32 (lamp 1) and D33 (lamp 2), powered from 3V3.
// Relay modules (active-LOW): IN -> D26 (lamp 1) and D27 (lamp 2). Each relay switches one small
// lamp within its contact rating — 230 V wiring by an electrician. Touch a pad to toggle its lamp;
// the same lamps can be switched from http://<board-ip>/ on your home Wi-Fi.
#include <WiFi.h>
#include <WebServer.h>
#include "fr_settings.h"

const char* WIFI_SSID = "YOUR_SSID";      // optional: touch pads work without Wi-Fi
const char* WIFI_PASS = "YOUR_PASSWORD";
// Filled in from the FlashReady flasher over USB (kept on the board), or type the values above.
FrSetting SETTINGS[] = {{"wifi_ssid", &WIFI_SSID, false}, {"wifi_pass", &WIFI_PASS, false}};

constexpr uint8_t TOUCH_PIN[2] = {32, 33};
constexpr uint8_t RELAY_PIN[2] = {26, 27};
constexpr bool RELAY_ACTIVE_LOW = true;

WebServer server(80);
bool lampOn[2] = {false, false};
bool lastTouch[2] = {false, false};

void setLamp(int i, bool on) {
  lampOn[i] = on;
  digitalWrite(RELAY_PIN[i], (on != RELAY_ACTIVE_LOW) ? HIGH : LOW);
  Serial.printf("Lamp %d %s\n", i + 1, on ? "ON" : "OFF");
}

void handleRoot() {
  String html = F("<!doctype html><meta name=viewport content='width=device-width'><title>Lamps</title>"
                  "<body style='font-family:sans-serif;text-align:center'><h1>Lamps</h1>");
  for (int i = 0; i < 2; i++) {
    html += "<form method=post action='/toggle?n=" + String(i + 1) + "'><button style='font-size:2em;margin:.4em;width:80%'>Lamp " + String(i + 1) + ": " + (lampOn[i] ? "ON" : "OFF") + "</button></form>";
  }
  html += F("</body>");
  server.send(200, "text/html", html);
}

void setup() {
  for (int i = 0; i < 2; i++) {
    digitalWrite(RELAY_PIN[i], RELAY_ACTIVE_LOW ? HIGH : LOW);  // off before the pin becomes an output
    pinMode(RELAY_PIN[i], OUTPUT);
    pinMode(TOUCH_PIN[i], INPUT);
  }
  Serial.begin(115200);
  frSettingsBegin(SETTINGS);
  if (*WIFI_SSID) {
    WiFi.begin(WIFI_SSID, WIFI_PASS);
    server.on("/", handleRoot);
    server.on("/toggle", HTTP_POST, []() {
      int n = server.arg("n").toInt();
      if (n == 1 || n == 2) setLamp(n - 1, !lampOn[n - 1]);
      server.sendHeader("Location", "/");
      server.send(303);
    });
    server.begin();
  } else {
    Serial.println("Phone page off — no Wi-Fi name set. The touch pads still work.");
  }
}

void loop() {
  for (int i = 0; i < 2; i++) {
    bool t = digitalRead(TOUCH_PIN[i]) == HIGH;  // TTP223 default: HIGH while touched
    if (t && !lastTouch[i]) setLamp(i, !lampOn[i]);  // toggle on each new touch
    lastTouch[i] = t;
  }
  if (*WIFI_SSID) server.handleClient();

  static uint32_t lastInfo = 0;
  if (*WIFI_SSID && millis() - lastInfo > 10000) {
    lastInfo = millis();
    if (WiFi.status() == WL_CONNECTED) Serial.printf("Open http://%s/\n", WiFi.localIP().toString().c_str());
  }
  delay(20);
}
// Touch switch for two lamps, with a phone page — ESP32 DevKit V1 + 2x TTP223 + 2 relay modules
// TTP223 touch pads: I/O -> D32 (lamp 1) and D33 (lamp 2), powered from 3V3.
// Relay modules (active-LOW): IN -> D26 (lamp 1) and D27 (lamp 2). Each relay switches one small
// lamp within its contact rating — 230 V wiring by an electrician. Touch a pad to toggle its lamp;
// the same lamps can be switched from http://<board-ip>/ on your home Wi-Fi.
#include <WiFi.h>
#include <WebServer.h>
#include "fr_settings.h"
const char* WIFI_SSID = "YOUR_SSID"; // optional: touch pads work without Wi-Fi
const char* WIFI_PASS = "YOUR_PASSWORD";
// Filled in from the FlashReady flasher over USB (kept on the board), or type the values above.
FrSetting SETTINGS[] = {{"wifi_ssid", &WIFI_SSID, false}, {"wifi_pass", &WIFI_PASS, false}};
constexpr uint8_t TOUCH_PIN[2] = {32, 33};
constexpr uint8_t RELAY_PIN[2] = {26, 27};
constexpr bool RELAY_ACTIVE_LOW = true;
WebServer server(80);
bool lampOn[2] = {false, false};
bool lastTouch[2] = {false, false};
void setLamp(int i, bool on) {
lampOn[i] = on;
digitalWrite(RELAY_PIN[i], (on != RELAY_ACTIVE_LOW) ? HIGH : LOW);
Serial.printf("Lamp %d %s\n", i + 1, on ? "ON" : "OFF");
}
void handleRoot() {
String html = F("<!doctype html><meta name=viewport content='width=device-width'><title>Lamps</title>"
"<body style='font-family:sans-serif;text-align:center'><h1>Lamps</h1>");
for (int i = 0; i < 2; i++) {
html += "<form method=post action='/toggle?n=" + String(i + 1) + "'><button style='font-size:2em;margin:.4em;width:80%'>Lamp " + String(i + 1) + ": " + (lampOn[i] ? "ON" : "OFF") + "</button></form>";
}
html += F("</body>");
server.send(200, "text/html", html);
}
void setup() {
for (int i = 0; i < 2; i++) {
digitalWrite(RELAY_PIN[i], RELAY_ACTIVE_LOW ? HIGH : LOW); // off before the pin becomes an output
pinMode(RELAY_PIN[i], OUTPUT);
pinMode(TOUCH_PIN[i], INPUT);
}
Serial.begin(115200);
frSettingsBegin(SETTINGS);
if (*WIFI_SSID) {
WiFi.begin(WIFI_SSID, WIFI_PASS);
server.on("/", handleRoot);
server.on("/toggle", HTTP_POST, []() {
int n = server.arg("n").toInt();
if (n == 1 || n == 2) setLamp(n - 1, !lampOn[n - 1]);
server.sendHeader("Location", "/");
server.send(303);
});
server.begin();
} else {
Serial.println("Phone page off — no Wi-Fi name set. The touch pads still work.");
}
}
void loop() {
for (int i = 0; i < 2; i++) {
bool t = digitalRead(TOUCH_PIN[i]) == HIGH; // TTP223 default: HIGH while touched
if (t && !lastTouch[i]) setLamp(i, !lampOn[i]); // toggle on each new touch
lastTouch[i] = t;
}
if (*WIFI_SSID) server.handleClient();
static uint32_t lastInfo = 0;
if (*WIFI_SSID && millis() - lastInfo > 10000) {
lastInfo = millis();
if (WiFi.status() == WL_CONNECTED) Serial.printf("Open http://%s/\n", WiFi.localIP().toString().c_str());
}
delay(20);
}Arduino IDE: keep fr_settings.h in the same folder as the .ino (tab menu → New Tab, same name). Flashing from this page doesn’t need it.
// fr_settings.h — FlashReady on-board settings (Wi-Fi name, phone number, ...) over USB.
//
// Why: the pre-built file on flashready.in is the same for everyone, so your own settings
// can't be inside it. Instead the board asks for them over USB serial and keeps them in
// its EEPROM. If you use Arduino IDE you can still type them into the constants in the
// sketch — this file then changes nothing except a 2-second pause at start-up.
//
// The protocol, in plain words (one text line each way, ending in \n, at 115200 baud):
//  1. Right after Serial.begin(115200) the board prints
//       FR?SETTINGS v1 keys=wifi_ssid,wifi_pass missing=wifi_pass
//     "missing" lists the required settings that still have no real value.
//  2. If nothing is missing it listens for 2 seconds and then carries on. If something is
//     missing it keeps listening, printing the line again every 2 seconds, for up to
//     30 seconds; then it carries on anyway and the sketch skips whatever needs the
//     missing value (an alarm still sounds, it just can't send the SMS).
//  3. The flasher answers   FR!SET wifi_ssid=My%20Home&wifi_pass=secret
//     (values URL-encoded). The board stores them and answers FR!OK, then carries on with
//     the new values. Errors: FR!ERR unknown <key>, FR!ERR long <key> (nothing is stored).
//     A key that is left out keeps its stored value; "key=" (empty) removes it.
//     "FR!SET" with nothing after it means "carry on now": FR!OK, nothing is stored.
//  4. FR!CLEAR wipes everything that was stored, answers FR!OK and keeps listening.
//  Other lines are ignored.
//
// A stored value wins over the constant in the sketch. A constant that is still a
// placeholder ("YOUR_SSID", "your-wifi", "+91XXXXXXXXXX") or empty counts as not set.
//
// EEPROM block at FR_SETTINGS_ADDR: 'F' 'R' 0x01, length (uint16, low byte first), then
// "key=value\n" lines. Uses FR_SETTINGS_SIZE bytes; move FR_SETTINGS_ADDR with a #define
// before the #include if your sketch uses EEPROM for something else.
//
// Use in a sketch:
//   const char* WIFI_SSID = "YOUR_SSID";
//   FrSetting SETTINGS[] = { {"wifi_ssid", &WIFI_SSID, true} };   // key, constant, required
//   void setup() { Serial.begin(115200); frSettingsBegin(SETTINGS); ... WiFi.begin(WIFI_SSID, ...); }
// After frSettingsBegin() each constant points at the value to use ("" if none is set).
#pragma once
#include <Arduino.h>
#include <EEPROM.h>
#include <string.h>

#ifndef FR_SETTINGS_ADDR
#define FR_SETTINGS_ADDR 0
#endif
#ifndef FR_SETTINGS_SIZE
#if defined(__AVR__)
#define FR_SETTINGS_SIZE 96  // 2 KB of RAM on an Uno: a phone number fits easily
#else
#define FR_SETTINGS_SIZE 512
#endif
#endif
#ifndef FR_LINE_MAX
#if defined(__AVR__)
#define FR_LINE_MAX 128
#else
#define FR_LINE_MAX 1024
#endif
#endif
#define FR_MAX_KEYS 8
#define FR_WAIT_MAX_MS 30000UL  // never wait longer than this for missing settings
#define FR_DATA_MAX (FR_SETTINGS_SIZE - 5)

struct FrSetting {
  const char* key;     // [a-z0-9_], as in settings.json
  const char** value;  // the sketch's constant; replaced by the value to use
  bool required;
};

// Stored settings in RAM as "key=value\0key=value\0" (only non-empty values).
static char frData[FR_DATA_MAX + 1];
static uint16_t frLen = 0;

static inline void frEepromBegin() {
#if defined(ESP32) || defined(ESP8266)
  static bool started = false;
  if (!started) EEPROM.begin(FR_SETTINGS_ADDR + FR_SETTINGS_SIZE);
  started = true;
#endif
}

static inline void frLoad() {
  frEepromBegin();
  frLen = 0;
  frData[0] = 0;
  if (EEPROM.read(FR_SETTINGS_ADDR) != 'F' || EEPROM.read(FR_SETTINGS_ADDR + 1) != 'R' || EEPROM.read(FR_SETTINGS_ADDR + 2) != 1) return;
  uint16_t n = EEPROM.read(FR_SETTINGS_ADDR + 3) | (EEPROM.read(FR_SETTINGS_ADDR + 4) << 8);
  if (n > FR_DATA_MAX) return;
  for (uint16_t i = 0; i < n; i++) {
    char c = EEPROM.read(FR_SETTINGS_ADDR + 5 + i);
    frData[i] = c == '\n' ? '\0' : c;
  }
  frData[n] = 0;
  frLen = n;
}

static inline void frPut(int addr, uint8_t b) {
#if defined(__AVR__)
  EEPROM.update(addr, b);
#else
  EEPROM.write(addr, b);
#endif
}

static inline void frSave() {
  frEepromBegin();
  frPut(FR_SETTINGS_ADDR, 'F');
  frPut(FR_SETTINGS_ADDR + 1, 'R');
  frPut(FR_SETTINGS_ADDR + 2, 1);
  frPut(FR_SETTINGS_ADDR + 3, frLen & 0xFF);
  frPut(FR_SETTINGS_ADDR + 4, frLen >> 8);
  for (uint16_t i = 0; i < frLen; i++) frPut(FR_SETTINGS_ADDR + 5 + i, frData[i] ? frData[i] : '\n');
#if defined(ESP32) || defined(ESP8266)
  EEPROM.commit();
#endif
}

// The stored value for key, or nullptr.
static inline const char* frStored(const char* key) {
  size_t kl = strlen(key);
  for (uint16_t i = 0; i < frLen; i += strlen(frData + i) + 1) {
    if (strncmp(frData + i, key, kl) == 0 && frData[i + kl] == '=') return frData + i + kl + 1;
  }
  return nullptr;
}

// Empty, "your_…" / "YOUR-…" / "your …", or a "+91XXXX…" phone number.
static inline bool frIsPlaceholder(const char* v) {
  if (!v || !*v) return true;
  if (strncasecmp(v, "your", 4) == 0 && (v[4] == '_' || v[4] == '-' || v[4] == ' ')) return true;
  return v[0] == '+' && strstr(v, "XXXX") != nullptr;
}

// The stored value for key, else the fallback constant; "" if that is a placeholder.
static inline const char* frSettingsGet(const char* key, const char* fallback) {
  const char* v = frStored(key);
  if (!v) v = fallback;
  return frIsPlaceholder(v) ? "" : v;
}

static inline bool frIsMissing(const FrSetting& s) {
  return s.required && !*frSettingsGet(s.key, *s.value);
}

static inline void frRequest(FrSetting* s, uint8_t n) {
  Serial.print(F("FR?SETTINGS v1 keys="));
  for (uint8_t i = 0; i < n; i++) {
    if (i) Serial.print(',');
    Serial.print(s[i].key);
  }
  Serial.print(F(" missing="));
  bool first = true;
  for (uint8_t i = 0; i < n; i++) {
    if (!frIsMissing(s[i])) continue;
    if (!first) Serial.print(',');
    Serial.print(s[i].key);
    first = false;
  }
  Serial.print('\n');
}

static inline void frReply(const __FlashStringHelper* what, const char* key) {
  Serial.print(what);
  Serial.print(key);
  Serial.print('\n');
}

static inline int8_t frHex(char c) {
  if (c >= '0' && c <= '9') return c - '0';
  c |= 0x20;
  return (c >= 'a' && c <= 'f') ? c - 'a' + 10 : -1;
}

// Percent-decodes in place. Drops NUL, CR and LF: they can't be stored.
static inline void frDecode(char* s) {
  char* o = s;
  for (; *s; s++) {
    char c = *s;
    if (c == '%' && frHex(s[1]) >= 0 && frHex(s[2]) >= 0) {
      c = (char)(frHex(s[1]) << 4 | frHex(s[2]));
      s += 2;
    }
    if (c != '\0' && c != '\n' && c != '\r') *o++ = c;
  }
  *o = 0;
}

// "k1=v1&k2=v2" (cut short if the line overflowed). Saves and returns true, or replies with an error.
static inline bool frSet(FrSetting* s, uint8_t n, char* p, bool overflow) {
  const char* upd[FR_MAX_KEYS] = {};
  while (*p) {
    char* amp = strchr(p, '&');
    bool last = !amp;
    if (amp) *amp = 0;
    char* eq = strchr(p, '=');
    if (eq) *eq = 0;
    if (*p) {
      if (last && overflow) {
        frReply(F("FR!ERR long "), p);
        return false;
      }
      uint8_t i = 0;
      while (i < n && strcmp(s[i].key, p) != 0) i++;
      if (i == n) {
        frReply(F("FR!ERR unknown "), p);
        return false;
      }
      char* v = eq ? eq + 1 : p + strlen(p);  // "key" alone = "key="
      frDecode(v);
      upd[i] = v;
    }
    if (last) break;
    p = amp + 1;
  }
  // Build the new block: for each key, the new value or the one already stored.
  char next[FR_DATA_MAX + 1];
  uint16_t len = 0;
  for (uint8_t i = 0; i < n; i++) {
    const char* v = upd[i] ? upd[i] : frStored(s[i].key);
    if (!v || !*v) continue;
    size_t kl = strlen(s[i].key), vl = strlen(v);
    if (len + kl + vl + 2 > FR_DATA_MAX) {
      frReply(F("FR!ERR long "), s[i].key);
      return false;
    }
    memcpy(next + len, s[i].key, kl);
    next[len + kl] = '=';
    memcpy(next + len + kl + 1, v, vl + 1);
    len += kl + vl + 2;
  }
  memcpy(frData, next, len);
  frData[len] = 0;
  frLen = len;
  frSave();
  return true;
}

// Handles one received line. Returns true once settings were saved (boot carries on).
static inline bool frCommand(FrSetting* s, uint8_t n, char* line, bool overflow) {
  if (strcmp(line, "FR!CLEAR") == 0) {
    frLen = 0;
    frData[0] = 0;
    frSave();
    Serial.print(F("FR!OK\n"));
    return false;
  }
  if (strncmp(line, "FR!SET", 6) != 0 || (line[6] != ' ' && line[6] != 0)) return false;  // not for us
  char* p = line + 6;
  while (*p == ' ') p++;
  if (*p && !frSet(s, n, p, overflow)) return false;  // empty FR!SET = carry on, store nothing
  Serial.print(F("FR!OK\n"));
  return true;
}

// Call right after Serial.begin(115200). Prints the request, waits as described at the top
// (30 s at most), then points every constant in the list at the value to use ("" = not set).
static inline void frSettingsBegin(FrSetting* s, uint8_t n) {
  frLoad();
  char line[FR_LINE_MAX];
  uint16_t len = 0;
  bool overflow = false;
  frRequest(s, n);
  unsigned long start = millis(), quietSince = start;
  while (millis() - start < FR_WAIT_MAX_MS) {
    int c = Serial.read();
    if (c >= 0) {
      quietSince = millis();
      if (c == '\r') continue;
      if (c != '\n') {
        if (len < FR_LINE_MAX - 1) line[len++] = (char)c;
        else overflow = true;
        continue;
      }
      line[len] = 0;
      bool saved = frCommand(s, n, line, overflow);
      len = 0;
      overflow = false;
      if (saved) break;
      continue;
    }
    if (millis() - quietSince < 2000) {
      delay(1);  // also keeps the ESP8266 watchdog fed
      continue;
    }
    len = 0;  // drop half a line
    overflow = false;
    bool missing = false;
    for (uint8_t i = 0; i < n; i++) missing |= frIsMissing(s[i]);
    if (!missing) break;
    frRequest(s, n);
    quietSince = millis();
  }
  for (uint8_t i = 0; i < n; i++) *s[i].value = frSettingsGet(s[i].key, *s[i].value);
}

template <size_t N>
static inline void frSettingsBegin(FrSetting (&s)[N]) {
  static_assert(N <= FR_MAX_KEYS, "fr_settings.h: at most FR_MAX_KEYS settings");
  frSettingsBegin(s, (uint8_t)N);
}
// fr_settings.h — FlashReady on-board settings (Wi-Fi name, phone number, ...) over USB.
//
// Why: the pre-built file on flashready.in is the same for everyone, so your own settings
// can't be inside it. Instead the board asks for them over USB serial and keeps them in
// its EEPROM. If you use Arduino IDE you can still type them into the constants in the
// sketch — this file then changes nothing except a 2-second pause at start-up.
//
// The protocol, in plain words (one text line each way, ending in \n, at 115200 baud):
// 1. Right after Serial.begin(115200) the board prints
// FR?SETTINGS v1 keys=wifi_ssid,wifi_pass missing=wifi_pass
// "missing" lists the required settings that still have no real value.
// 2. If nothing is missing it listens for 2 seconds and then carries on. If something is
// missing it keeps listening, printing the line again every 2 seconds, for up to
// 30 seconds; then it carries on anyway and the sketch skips whatever needs the
// missing value (an alarm still sounds, it just can't send the SMS).
// 3. The flasher answers FR!SET wifi_ssid=My%20Home&wifi_pass=secret
// (values URL-encoded). The board stores them and answers FR!OK, then carries on with
// the new values. Errors: FR!ERR unknown <key>, FR!ERR long <key> (nothing is stored).
// A key that is left out keeps its stored value; "key=" (empty) removes it.
// "FR!SET" with nothing after it means "carry on now": FR!OK, nothing is stored.
// 4. FR!CLEAR wipes everything that was stored, answers FR!OK and keeps listening.
// Other lines are ignored.
//
// A stored value wins over the constant in the sketch. A constant that is still a
// placeholder ("YOUR_SSID", "your-wifi", "+91XXXXXXXXXX") or empty counts as not set.
//
// EEPROM block at FR_SETTINGS_ADDR: 'F' 'R' 0x01, length (uint16, low byte first), then
// "key=value\n" lines. Uses FR_SETTINGS_SIZE bytes; move FR_SETTINGS_ADDR with a #define
// before the #include if your sketch uses EEPROM for something else.
//
// Use in a sketch:
// const char* WIFI_SSID = "YOUR_SSID";
// FrSetting SETTINGS[] = { {"wifi_ssid", &WIFI_SSID, true} }; // key, constant, required
// void setup() { Serial.begin(115200); frSettingsBegin(SETTINGS); ... WiFi.begin(WIFI_SSID, ...); }
// After frSettingsBegin() each constant points at the value to use ("" if none is set).
#pragma once
#include <Arduino.h>
#include <EEPROM.h>
#include <string.h>
#ifndef FR_SETTINGS_ADDR
#define FR_SETTINGS_ADDR 0
#endif
#ifndef FR_SETTINGS_SIZE
#if defined(__AVR__)
#define FR_SETTINGS_SIZE 96 // 2 KB of RAM on an Uno: a phone number fits easily
#else
#define FR_SETTINGS_SIZE 512
#endif
#endif
#ifndef FR_LINE_MAX
#if defined(__AVR__)
#define FR_LINE_MAX 128
#else
#define FR_LINE_MAX 1024
#endif
#endif
#define FR_MAX_KEYS 8
#define FR_WAIT_MAX_MS 30000UL // never wait longer than this for missing settings
#define FR_DATA_MAX (FR_SETTINGS_SIZE - 5)
struct FrSetting {
const char* key; // [a-z0-9_], as in settings.json
const char** value; // the sketch's constant; replaced by the value to use
bool required;
};
// Stored settings in RAM as "key=value\0key=value\0" (only non-empty values).
static char frData[FR_DATA_MAX + 1];
static uint16_t frLen = 0;
static inline void frEepromBegin() {
#if defined(ESP32) || defined(ESP8266)
static bool started = false;
if (!started) EEPROM.begin(FR_SETTINGS_ADDR + FR_SETTINGS_SIZE);
started = true;
#endif
}
static inline void frLoad() {
frEepromBegin();
frLen = 0;
frData[0] = 0;
if (EEPROM.read(FR_SETTINGS_ADDR) != 'F' || EEPROM.read(FR_SETTINGS_ADDR + 1) != 'R' || EEPROM.read(FR_SETTINGS_ADDR + 2) != 1) return;
uint16_t n = EEPROM.read(FR_SETTINGS_ADDR + 3) | (EEPROM.read(FR_SETTINGS_ADDR + 4) << 8);
if (n > FR_DATA_MAX) return;
for (uint16_t i = 0; i < n; i++) {
char c = EEPROM.read(FR_SETTINGS_ADDR + 5 + i);
frData[i] = c == '\n' ? '\0' : c;
}
frData[n] = 0;
frLen = n;
}
static inline void frPut(int addr, uint8_t b) {
#if defined(__AVR__)
EEPROM.update(addr, b);
#else
EEPROM.write(addr, b);
#endif
}
static inline void frSave() {
frEepromBegin();
frPut(FR_SETTINGS_ADDR, 'F');
frPut(FR_SETTINGS_ADDR + 1, 'R');
frPut(FR_SETTINGS_ADDR + 2, 1);
frPut(FR_SETTINGS_ADDR + 3, frLen & 0xFF);
frPut(FR_SETTINGS_ADDR + 4, frLen >> 8);
for (uint16_t i = 0; i < frLen; i++) frPut(FR_SETTINGS_ADDR + 5 + i, frData[i] ? frData[i] : '\n');
#if defined(ESP32) || defined(ESP8266)
EEPROM.commit();
#endif
}
// The stored value for key, or nullptr.
static inline const char* frStored(const char* key) {
size_t kl = strlen(key);
for (uint16_t i = 0; i < frLen; i += strlen(frData + i) + 1) {
if (strncmp(frData + i, key, kl) == 0 && frData[i + kl] == '=') return frData + i + kl + 1;
}
return nullptr;
}
// Empty, "your_…" / "YOUR-…" / "your …", or a "+91XXXX…" phone number.
static inline bool frIsPlaceholder(const char* v) {
if (!v || !*v) return true;
if (strncasecmp(v, "your", 4) == 0 && (v[4] == '_' || v[4] == '-' || v[4] == ' ')) return true;
return v[0] == '+' && strstr(v, "XXXX") != nullptr;
}
// The stored value for key, else the fallback constant; "" if that is a placeholder.
static inline const char* frSettingsGet(const char* key, const char* fallback) {
const char* v = frStored(key);
if (!v) v = fallback;
return frIsPlaceholder(v) ? "" : v;
}
static inline bool frIsMissing(const FrSetting& s) {
return s.required && !*frSettingsGet(s.key, *s.value);
}
static inline void frRequest(FrSetting* s, uint8_t n) {
Serial.print(F("FR?SETTINGS v1 keys="));
for (uint8_t i = 0; i < n; i++) {
if (i) Serial.print(',');
Serial.print(s[i].key);
}
Serial.print(F(" missing="));
bool first = true;
for (uint8_t i = 0; i < n; i++) {
if (!frIsMissing(s[i])) continue;
if (!first) Serial.print(',');
Serial.print(s[i].key);
first = false;
}
Serial.print('\n');
}
static inline void frReply(const __FlashStringHelper* what, const char* key) {
Serial.print(what);
Serial.print(key);
Serial.print('\n');
}
static inline int8_t frHex(char c) {
if (c >= '0' && c <= '9') return c - '0';
c |= 0x20;
return (c >= 'a' && c <= 'f') ? c - 'a' + 10 : -1;
}
// Percent-decodes in place. Drops NUL, CR and LF: they can't be stored.
static inline void frDecode(char* s) {
char* o = s;
for (; *s; s++) {
char c = *s;
if (c == '%' && frHex(s[1]) >= 0 && frHex(s[2]) >= 0) {
c = (char)(frHex(s[1]) << 4 | frHex(s[2]));
s += 2;
}
if (c != '\0' && c != '\n' && c != '\r') *o++ = c;
}
*o = 0;
}
// "k1=v1&k2=v2" (cut short if the line overflowed). Saves and returns true, or replies with an error.
static inline bool frSet(FrSetting* s, uint8_t n, char* p, bool overflow) {
const char* upd[FR_MAX_KEYS] = {};
while (*p) {
char* amp = strchr(p, '&');
bool last = !amp;
if (amp) *amp = 0;
char* eq = strchr(p, '=');
if (eq) *eq = 0;
if (*p) {
if (last && overflow) {
frReply(F("FR!ERR long "), p);
return false;
}
uint8_t i = 0;
while (i < n && strcmp(s[i].key, p) != 0) i++;
if (i == n) {
frReply(F("FR!ERR unknown "), p);
return false;
}
char* v = eq ? eq + 1 : p + strlen(p); // "key" alone = "key="
frDecode(v);
upd[i] = v;
}
if (last) break;
p = amp + 1;
}
// Build the new block: for each key, the new value or the one already stored.
char next[FR_DATA_MAX + 1];
uint16_t len = 0;
for (uint8_t i = 0; i < n; i++) {
const char* v = upd[i] ? upd[i] : frStored(s[i].key);
if (!v || !*v) continue;
size_t kl = strlen(s[i].key), vl = strlen(v);
if (len + kl + vl + 2 > FR_DATA_MAX) {
frReply(F("FR!ERR long "), s[i].key);
return false;
}
memcpy(next + len, s[i].key, kl);
next[len + kl] = '=';
memcpy(next + len + kl + 1, v, vl + 1);
len += kl + vl + 2;
}
memcpy(frData, next, len);
frData[len] = 0;
frLen = len;
frSave();
return true;
}
// Handles one received line. Returns true once settings were saved (boot carries on).
static inline bool frCommand(FrSetting* s, uint8_t n, char* line, bool overflow) {
if (strcmp(line, "FR!CLEAR") == 0) {
frLen = 0;
frData[0] = 0;
frSave();
Serial.print(F("FR!OK\n"));
return false;
}
if (strncmp(line, "FR!SET", 6) != 0 || (line[6] != ' ' && line[6] != 0)) return false; // not for us
char* p = line + 6;
while (*p == ' ') p++;
if (*p && !frSet(s, n, p, overflow)) return false; // empty FR!SET = carry on, store nothing
Serial.print(F("FR!OK\n"));
return true;
}
// Call right after Serial.begin(115200). Prints the request, waits as described at the top
// (30 s at most), then points every constant in the list at the value to use ("" = not set).
static inline void frSettingsBegin(FrSetting* s, uint8_t n) {
frLoad();
char line[FR_LINE_MAX];
uint16_t len = 0;
bool overflow = false;
frRequest(s, n);
unsigned long start = millis(), quietSince = start;
while (millis() - start < FR_WAIT_MAX_MS) {
int c = Serial.read();
if (c >= 0) {
quietSince = millis();
if (c == '\r') continue;
if (c != '\n') {
if (len < FR_LINE_MAX - 1) line[len++] = (char)c;
else overflow = true;
continue;
}
line[len] = 0;
bool saved = frCommand(s, n, line, overflow);
len = 0;
overflow = false;
if (saved) break;
continue;
}
if (millis() - quietSince < 2000) {
delay(1); // also keeps the ESP8266 watchdog fed
continue;
}
len = 0; // drop half a line
overflow = false;
bool missing = false;
for (uint8_t i = 0; i < n; i++) missing |= frIsMissing(s[i]);
if (!missing) break;
frRequest(s, n);
quietSince = millis();
}
for (uint8_t i = 0; i < n; i++) *s[i].value = frSettingsGet(s[i].key, *s[i].value);
}
template <size_t N>
static inline void frSettingsBegin(FrSetting (&s)[N]) {
static_assert(N <= FR_MAX_KEYS, "fr_settings.h: at most FR_MAX_KEYS settings");
frSettingsBegin(s, (uint8_t)N);
}Compiled for esp32 on esp32 3.3.12 · 3 Nov 2026
How it works
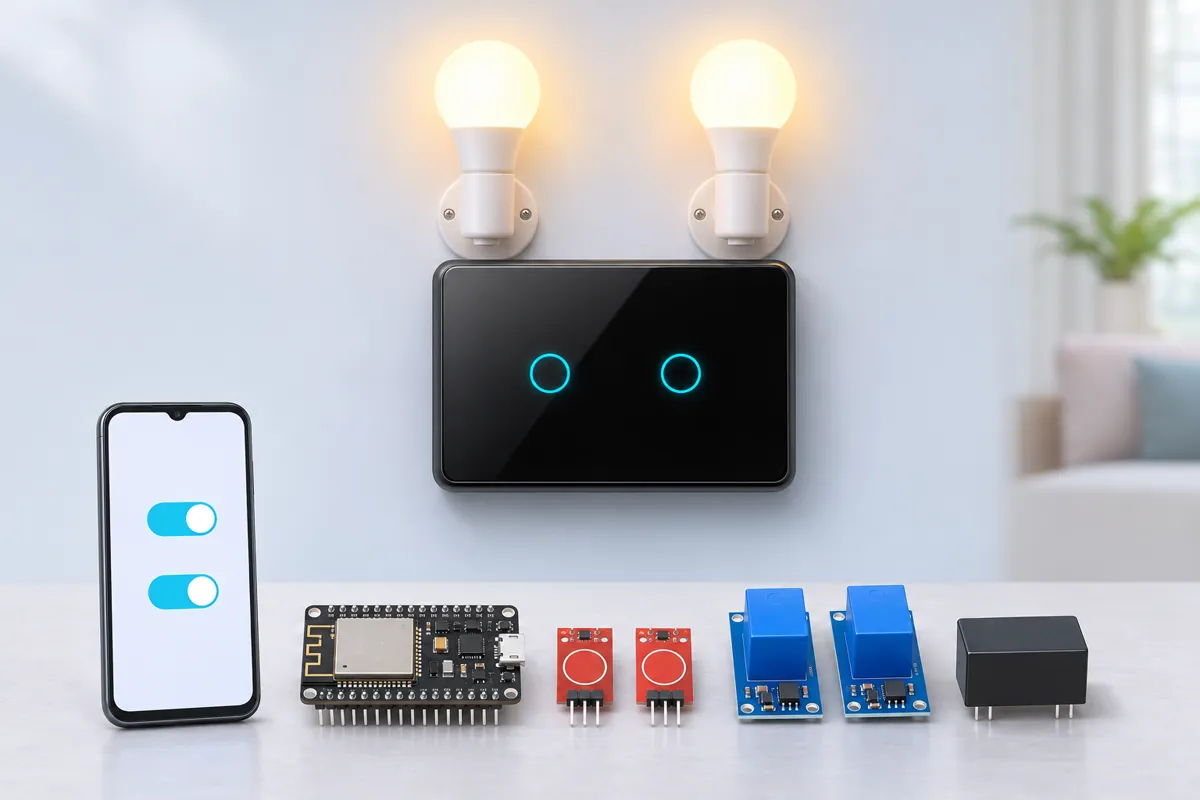
Touch switch panels are popular in new Indian flats, but they cost several thousand rupees per board and a broken one needs the brand’s technician. This project builds a two-lamp touch panel from two ₹20 touch modules and an ESP32, and adds a phone page for free.
How it works
Each TTP223 module is a capacitive touch sensor with its own chip. Its pad senses a finger through a few millimetres of acrylic or glass, and its I/O pin goes HIGH while touched. The ESP32 watches D32 and D33 and toggles the matching lamp on each new touch — holding your finger on the pad doesn’t make it flicker.
Each lamp has its own relay module. Its pin is set HIGH (off) before it becomes an output, so the lamps never flash on during boot.
If you enter your Wi-Fi name and password when flashing, the ESP32 also serves a small page at its IP address with one big button per lamp. The phone and the pads change the same state, so the page always shows what the lamps are really doing.
Why these parts
- TTP223 — self-calibrating, works through acrylic, and gives a clean digital output; no fiddly touch-pin tuning on the ESP32.
- Two separate relay modules — each lamp keeps its own relay and live feed, so a fault in one doesn’t take out the other.
- ESP32 — Wi-Fi for the phone page and plenty of free pins for more pads.
India notes
Modular switch boxes in India are 3, 6 or 8 modules wide, and deep enough for a small SMPS and the boards if you plan it. Indian wiring often has no neutral at the switch box (only live goes down to the switch). The SMPS needs neutral — ask the electrician to run one before you start.
Troubleshooting
A lamp toggles on its own
The pad is picking up noise or moisture. Keep pad wires short and away from 230 V wires, and wipe condensation off the front plate. Some TTP223 boards have an A/B jumper for sensitivity.
Touching does nothing
Check the pad’s own LED lights when touched. If it does but the lamp doesn’t switch, check I/O goes to D32/D33. If its LED never lights, the plate is too thick — try 2 mm.
The phone page doesn’t open
Open the Serial Monitor at 115200: the sketch prints its address every 10 s. Your phone must be on the same Wi-Fi.
Upgrades
- Add a third pad that switches both lamps off — handy at the bedroom door.
- Remember the lamp states across power cuts with Preferences, for lamps that should come back on.
- Add a small WS2812 LED behind each pad that glows when its lamp is on.