Parts list
| Part | Qty | Approx. | Buy |
|---|---|---|---|
| ESP32-S3-DevKitC-1 (N8R2 or N16R8, two USB-C ports) | 1 | ₹750 | Buy ESP32-S3-DevKitC-1 (N8R2 or N16R8, two USB-C ports) |
| 12 mm tactile push button with cap | 6 | ₹72 | Buy 12 mm tactile push button with cap |
| 0.96" SSD1306 I2C OLED (4-pin) | 1 | ₹220 | Buy 0.96" SSD1306 I2C OLED (4-pin) |
| USB-C data cable (not charge-only) | 1 | ₹120 | Buy USB-C data cable (not charge-only) |
| Small ABS project box + printed key labels | 1 | ₹150 | Buy Small ABS project box + printed key labels |
| Jumper wires / ribbon cable | 1 | ₹40 | Buy Jumper wires / ribbon cable |
| Total | ₹1,352 |
Affiliate disclosure: “Buy” links may earn FlashReady a small commission at no extra cost to you. Prices are indicative.
Wiring
| ESP32-S3-DevKitC-1 | Part · pin | Wire | Notes |
|---|---|---|---|
| 4 | Push button (6 mm tactile switch) · 1 | yellow | F8 Sales — GPIO4, INPUT_PULLUP |
| GND | Push button (6 mm tactile switch) · 2 | black | |
| 5 | Push button (6 mm tactile switch) #2 · 1 | yellow | F9 Purchase — GPIO5 |
| GND | Push button (6 mm tactile switch) #2 · 2 | black | |
| 6 | Push button (6 mm tactile switch) #3 · 1 | yellow | F6 Receipt — GPIO6 |
| GND | Push button (6 mm tactile switch) #3 · 2 | black | |
| 7 | Push button (6 mm tactile switch) #4 · 1 | yellow | F5 Payment — GPIO7 |
| GND | Push button (6 mm tactile switch) #4 · 2 | black | |
| 1 | Push button (6 mm tactile switch) #5 · 1 | yellow | F2 Date — GPIO1 |
| GND | Push button (6 mm tactile switch) #5 · 2 | black | |
| 2 | Push button (6 mm tactile switch) #6 · 1 | green | Ctrl+A Save — GPIO2 |
| GND | Push button (6 mm tactile switch) #6 · 2 | black | |
| 8 | SSD1306 OLED 0.96″ (128×64, I2C) · SDA | blue | GPIO8 — the S3’s default I2C SDA |
| 9 | SSD1306 OLED 0.96″ (128×64, I2C) · SCL | yellow | GPIO9 — default I2C SCL |
| 3V3 | SSD1306 OLED 0.96″ (128×64, I2C) · VCC | red | |
| GND | SSD1306 OLED 0.96″ (128×64, I2C) · GND | black |
Board quirks: The DevKitC-1 has <strong>two USB-C ports</strong>. Upload and Serial Monitor use the one printed <strong>UART</strong>; the billing PC plugs into the one printed <strong>USB</strong> (native USB on GPIO19/20). Either port powers the board. The keyboard needs the S3’s USB-OTG controller, so the profile sets <code>USB Mode = USB-OTG (TinyUSB)</code>. With the default “Hardware CDC and JTAG” the sketch stops with a clear compile error instead of silently doing nothing. All six buttons are on plain GPIOs (1, 2, 4–7) with the internal pull-ups. GPIO0, 3, 45 and 46 are strapping pins and stay free; GPIO19/20 are the USB lines. It types the keys exactly like a keyboard, so it works with any billing software — change the labels and keys in <code>keys[]</code> for Busy, Marg or Excel.
Code
// Tally shortcut keypad — ESP32-S3-DevKitC-1 as a plain USB keyboard (no driver, no app).
// Six buttons send the TallyPrime voucher keys; the OLED shows the last key and a count.
// The S3 has a real USB controller: plug the PC into the port printed "USB" (GPIO19/20),
// not "UART". The "UART" port still carries Serial for debugging.
// Board option: USB Mode = USB-OTG (TinyUSB) — the sketch.yaml profile sets it.
// Buttons: one leg to the GPIO, the other to GND (INPUT_PULLUP, pressed = LOW).
// OLED (SSD1306, I2C 0x3C): SDA GPIO8, SCL GPIO9 (the S3's default Wire pins).
#if ARDUINO_USB_MODE
#error "Set Tools > USB Mode to 'USB-OTG (TinyUSB)' - the keyboard needs the S3's USB-OTG controller"
#endif
#include <USB.h>
#include <USBHIDKeyboard.h>
#include <Wire.h>
#include <Adafruit_GFX.h>
#include <Adafruit_SSD1306.h>

USBHIDKeyboard Keyboard;
Adafruit_SSD1306 oled(128, 64, &Wire, -1);

struct Key {
  uint8_t pin;
  const char* label;  // shown on the OLED and in Serial
  uint8_t mod;        // 0, KEY_LEFT_CTRL, KEY_LEFT_ALT...
  uint8_t key;
};
// Change these to your own shortcuts. TallyPrime: F8 Sales, F9 Purchase, F6 Receipt,
// F5 Payment, F2 change date, Ctrl+A accept (save) the voucher.
Key keys[] = {
  {4, "F8 Sales", 0, KEY_F8},
  {5, "F9 Purchase", 0, KEY_F9},
  {6, "F6 Receipt", 0, KEY_F6},
  {7, "F5 Payment", 0, KEY_F5},
  {1, "F2 Date", 0, KEY_F2},
  {2, "Ctrl+A Save", KEY_LEFT_CTRL, 'a'},
};
constexpr uint8_t N = sizeof(keys) / sizeof(keys[0]);
bool down[N];
uint32_t changedAt[N];
uint32_t sent = 0;
const char* last = "-";

void show() {
  oled.clearDisplay();
  oled.setTextColor(SSD1306_WHITE);
  oled.setTextSize(1);
  oled.setCursor(0, 0);
  oled.print("Tally keys  sent ");
  oled.print(sent);
  oled.drawFastHLine(0, 10, 128, SSD1306_WHITE);
  oled.setTextSize(2);
  oled.setCursor(0, 18);
  oled.print(last);
  oled.setTextSize(1);
  oled.setCursor(0, 54);
  oled.print("PC on the USB port");
  oled.display();
}

void setup() {
  Serial.begin(115200);  // the "UART" port
  for (uint8_t i = 0; i < N; i++) pinMode(keys[i].pin, INPUT_PULLUP);
  Wire.begin(8, 9);
  if (!oled.begin(SSD1306_SWITCHCAPVCC, 0x3C)) Serial.println("OLED not found at 0x3C");
  Keyboard.begin();
  USB.productName("FlashReady Tally Keypad");
  USB.begin();
  show();
  Serial.println("Tally keypad ready - plug the PC into the USB port");
}

void loop() {
  uint32_t now = millis();
  for (uint8_t i = 0; i < N; i++) {
    bool pressed = digitalRead(keys[i].pin) == LOW;
    if (pressed == down[i] || now - changedAt[i] < 25) continue;  // 25 ms debounce
    down[i] = pressed;
    changedAt[i] = now;
    if (!pressed) continue;
    if (keys[i].mod) Keyboard.press(keys[i].mod);
    Keyboard.press(keys[i].key);
    delay(15);
    Keyboard.releaseAll();
    sent++;
    last = keys[i].label;
    Serial.printf("key %s (GPIO%u)\n", last, keys[i].pin);
    show();
  }
  delay(2);
}
// Tally shortcut keypad — ESP32-S3-DevKitC-1 as a plain USB keyboard (no driver, no app).
// Six buttons send the TallyPrime voucher keys; the OLED shows the last key and a count.
// The S3 has a real USB controller: plug the PC into the port printed "USB" (GPIO19/20),
// not "UART". The "UART" port still carries Serial for debugging.
// Board option: USB Mode = USB-OTG (TinyUSB) — the sketch.yaml profile sets it.
// Buttons: one leg to the GPIO, the other to GND (INPUT_PULLUP, pressed = LOW).
// OLED (SSD1306, I2C 0x3C): SDA GPIO8, SCL GPIO9 (the S3's default Wire pins).
#if ARDUINO_USB_MODE
#error "Set Tools > USB Mode to 'USB-OTG (TinyUSB)' - the keyboard needs the S3's USB-OTG controller"
#endif
#include <USB.h>
#include <USBHIDKeyboard.h>
#include <Wire.h>
#include <Adafruit_GFX.h>
#include <Adafruit_SSD1306.h>
USBHIDKeyboard Keyboard;
Adafruit_SSD1306 oled(128, 64, &Wire, -1);
struct Key {
uint8_t pin;
const char* label; // shown on the OLED and in Serial
uint8_t mod; // 0, KEY_LEFT_CTRL, KEY_LEFT_ALT...
uint8_t key;
};
// Change these to your own shortcuts. TallyPrime: F8 Sales, F9 Purchase, F6 Receipt,
// F5 Payment, F2 change date, Ctrl+A accept (save) the voucher.
Key keys[] = {
{4, "F8 Sales", 0, KEY_F8},
{5, "F9 Purchase", 0, KEY_F9},
{6, "F6 Receipt", 0, KEY_F6},
{7, "F5 Payment", 0, KEY_F5},
{1, "F2 Date", 0, KEY_F2},
{2, "Ctrl+A Save", KEY_LEFT_CTRL, 'a'},
};
constexpr uint8_t N = sizeof(keys) / sizeof(keys[0]);
bool down[N];
uint32_t changedAt[N];
uint32_t sent = 0;
const char* last = "-";
void show() {
oled.clearDisplay();
oled.setTextColor(SSD1306_WHITE);
oled.setTextSize(1);
oled.setCursor(0, 0);
oled.print("Tally keys sent ");
oled.print(sent);
oled.drawFastHLine(0, 10, 128, SSD1306_WHITE);
oled.setTextSize(2);
oled.setCursor(0, 18);
oled.print(last);
oled.setTextSize(1);
oled.setCursor(0, 54);
oled.print("PC on the USB port");
oled.display();
}
void setup() {
Serial.begin(115200); // the "UART" port
for (uint8_t i = 0; i < N; i++) pinMode(keys[i].pin, INPUT_PULLUP);
Wire.begin(8, 9);
if (!oled.begin(SSD1306_SWITCHCAPVCC, 0x3C)) Serial.println("OLED not found at 0x3C");
Keyboard.begin();
USB.productName("FlashReady Tally Keypad");
USB.begin();
show();
Serial.println("Tally keypad ready - plug the PC into the USB port");
}
void loop() {
uint32_t now = millis();
for (uint8_t i = 0; i < N; i++) {
bool pressed = digitalRead(keys[i].pin) == LOW;
if (pressed == down[i] || now - changedAt[i] < 25) continue; // 25 ms debounce
down[i] = pressed;
changedAt[i] = now;
if (!pressed) continue;
if (keys[i].mod) Keyboard.press(keys[i].mod);
Keyboard.press(keys[i].key);
delay(15);
Keyboard.releaseAll();
sent++;
last = keys[i].label;
Serial.printf("key %s (GPIO%u)\n", last, keys[i].pin);
show();
}
delay(2);
}Compiled for s3devkitc on esp32 3.3.12 with Adafruit SSD1306 2.5.17 · 3 Nov 2026
How it works
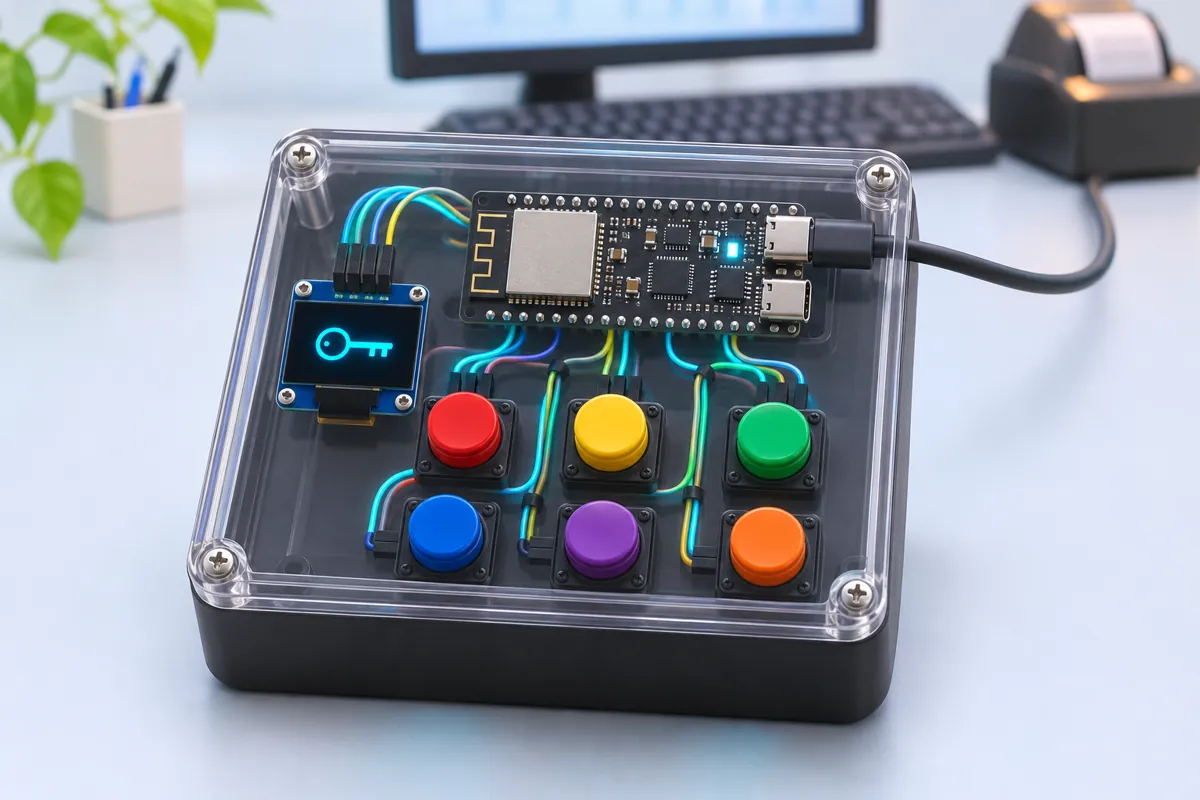
At a busy shop counter the same few keys are pressed hundreds of times a day: F8 for a sales voucher, F9 for a purchase, F6 and F5 for receipts and payments, F2 to change the date and Ctrl+A to accept. On a laptop keyboard the function keys are small and often hidden behind an Fn key. This keypad puts each one on a big button with a printed label.
The ESP32-S3 is the right board for this because it has a real USB controller inside the chip. With TinyUSB it appears to Windows, Linux or macOS as an ordinary USB keyboard — no driver, no app, and nothing to install on the billing PC. Boards like the classic ESP32 or the ESP32-C3 can’t do that: their USB is only a serial port.
Each button sits between a GPIO and GND with the internal pull-up switched on, so a press reads LOW. The sketch waits 25 ms for the contact to settle, then presses the key (and Ctrl, if the shortcut needs it), holds it for 15 ms and releases everything — the same as a quick tap on a real keyboard. The OLED shows the last shortcut sent and how many keys have been sent since power-on, so a cashier can see that the press registered.
The DevKitC-1 has two USB-C sockets. Keep the PC on the one printed USB; the UART socket stays free for uploads and the Serial Monitor, which logs every key with its GPIO. Edit the keys[] table to make it a keypad for any other software.
Troubleshooting
The PC doesn’t react to the buttons
The cable is in the UART port, or it is a charge-only cable. Move a data cable to the port printed USB. Windows shows a new keyboard under Device Manager → Keyboards.
Uploading fails after the first flash
Upload through the UART port. If the board still won’t take a new sketch, hold BOOT, tap RST, release BOOT, then upload.
One press types the key twice
A worn or cheap button bounces longer than 25 ms. Raise the debounce time in loop() to 40 ms.
The OLED stays black
Check SDA on GPIO8 and SCL on GPIO9, and run the I2C scanner. A few OLEDs answer at 0x3D.
Upgrades
- Add a rotary encoder that scrolls through ledgers (arrow keys) and presses Enter on a click.
- Hold a key for 1 s to send a second shortcut, doubling the keypad without more buttons.
- Use mechanical key switches (Cherry MX-style) in a 3D-printed plate for a keypad that lasts years at a busy counter.