Parts list
| Part | Qty | Approx. | Buy |
|---|---|---|---|
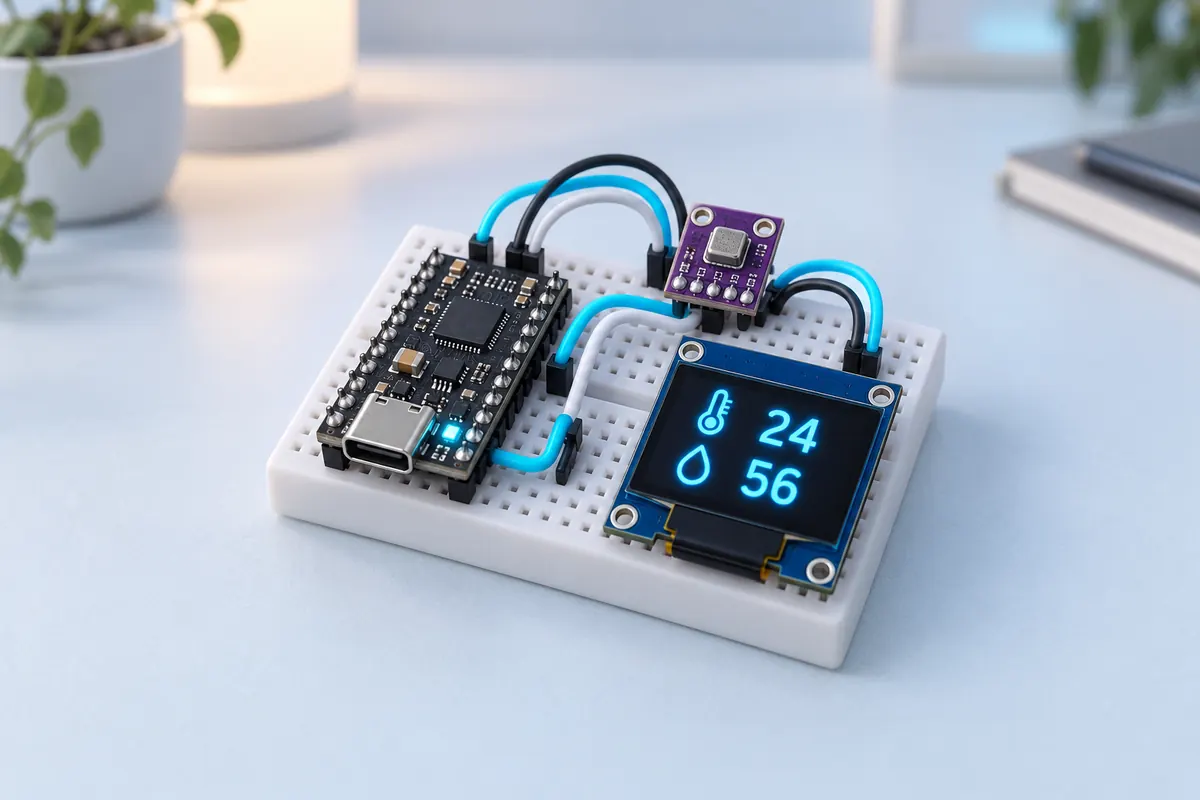
| ESP32-C3 SuperMini | 1 | ₹250 | Buy ESP32-C3 SuperMini |
| BME280 breakout (I2C, 3.3 V) | 1 | ₹280 | Buy BME280 breakout (I2C, 3.3 V) |
| 0.96" SSD1306 OLED, I2C, 4-pin | 1 | ₹180 | Buy 0.96" SSD1306 OLED, I2C, 4-pin |
| Mini breadboard + jumper wires | 1 | ₹60 | Buy Mini breadboard + jumper wires |
| Total | ₹770 |
Affiliate disclosure: “Buy” links may earn FlashReady a small commission at no extra cost to you. Prices are indicative.
Wiring
| ESP32-C3 SuperMini | Part · pin | Wire | Notes |
|---|---|---|---|
| 3V3 | BME280 breakout · VIN / VCC | red | |
| GND | BME280 breakout · GND | black | |
| 5 | BME280 breakout · SDA | blue | |
| 6 | BME280 breakout · SCL | yellow | |
| 3V3 | SSD1306 OLED 0.96″ (128×64, I2C) · VCC | red | |
| GND | SSD1306 OLED 0.96″ (128×64, I2C) · GND | black | |
| 5 | SSD1306 OLED 0.96″ (128×64, I2C) · SDA | blue | |
| 6 | SSD1306 OLED 0.96″ (128×64, I2C) · SCL | yellow |
Board quirks: The C3 SuperMini’s default I2C pins (8 and 9) are strapping pins with the LED and BOOT button on them, so this build uses GPIO5 and 6 with <code>Wire.begin(5, 6)</code>. Enable “USB CDC On Boot” (the sketch profile does) or the Serial Monitor stays silent.
Code
// Room climate monitor — ESP32-C3 SuperMini + BME280 + 0.96" SSD1306 OLED.
// Temperature, humidity, pressure and dew point on a small OLED, refreshed every 2 s.
// Both modules share I2C on GPIO5 (SDA) and GPIO6 (SCL): BME280 at 0x76, OLED at 0x3C.
#include <Wire.h>
#include <Adafruit_BME280.h>
#include <Adafruit_GFX.h>
#include <Adafruit_SSD1306.h>

constexpr int SDA_PIN = 5, SCL_PIN = 6;
Adafruit_BME280 bme;
Adafruit_SSD1306 oled(128, 64, &Wire, -1);

// Magnus formula — good to about ±0.4 °C for normal room conditions.
float dewPoint(float t, float rh) {
  const float a = 17.62, b = 243.12;
  float g = log(rh / 100.0) + a * t / (b + t);
  return b * g / (a - g);
}

void setup() {
  Serial.begin(115200);
  Wire.begin(SDA_PIN, SCL_PIN);
  if (!bme.begin(0x76, &Wire)) Serial.println("BME280 not found at 0x76 (try 0x77)");
  if (!oled.begin(SSD1306_SWITCHCAPVCC, 0x3C)) Serial.println("OLED not found at 0x3C");
  oled.setTextColor(SSD1306_WHITE);
}

void loop() {
  float t = bme.readTemperature();
  float h = bme.readHumidity();
  float p = bme.readPressure() / 100.0;   // Pa → hPa
  float dp = dewPoint(t, h);

  oled.clearDisplay();
  oled.setTextSize(2);
  oled.setCursor(0, 0);
  oled.printf("%.1f C", t);
  oled.setCursor(0, 20);
  oled.printf("%.0f %%RH", h);
  oled.setTextSize(1);
  oled.setCursor(0, 44);
  oled.printf("%.0f hPa", p);
  oled.setCursor(0, 56);
  oled.printf("Dew point %.1f C", dp);
  oled.display();

  Serial.printf("T=%.1fC RH=%.0f%% P=%.0fhPa dew=%.1fC\n", t, h, p, dp);
  delay(2000);
}
// Room climate monitor — ESP32-C3 SuperMini + BME280 + 0.96" SSD1306 OLED.
// Temperature, humidity, pressure and dew point on a small OLED, refreshed every 2 s.
// Both modules share I2C on GPIO5 (SDA) and GPIO6 (SCL): BME280 at 0x76, OLED at 0x3C.
#include <Wire.h>
#include <Adafruit_BME280.h>
#include <Adafruit_GFX.h>
#include <Adafruit_SSD1306.h>
constexpr int SDA_PIN = 5, SCL_PIN = 6;
Adafruit_BME280 bme;
Adafruit_SSD1306 oled(128, 64, &Wire, -1);
// Magnus formula — good to about ±0.4 °C for normal room conditions.
float dewPoint(float t, float rh) {
const float a = 17.62, b = 243.12;
float g = log(rh / 100.0) + a * t / (b + t);
return b * g / (a - g);
}
void setup() {
Serial.begin(115200);
Wire.begin(SDA_PIN, SCL_PIN);
if (!bme.begin(0x76, &Wire)) Serial.println("BME280 not found at 0x76 (try 0x77)");
if (!oled.begin(SSD1306_SWITCHCAPVCC, 0x3C)) Serial.println("OLED not found at 0x3C");
oled.setTextColor(SSD1306_WHITE);
}
void loop() {
float t = bme.readTemperature();
float h = bme.readHumidity();
float p = bme.readPressure() / 100.0; // Pa → hPa
float dp = dewPoint(t, h);
oled.clearDisplay();
oled.setTextSize(2);
oled.setCursor(0, 0);
oled.printf("%.1f C", t);
oled.setCursor(0, 20);
oled.printf("%.0f %%RH", h);
oled.setTextSize(1);
oled.setCursor(0, 44);
oled.printf("%.0f hPa", p);
oled.setCursor(0, 56);
oled.printf("Dew point %.1f C", dp);
oled.display();
Serial.printf("T=%.1fC RH=%.0f%% P=%.0fhPa dew=%.1fC\n", t, h, p, dp);
delay(2000);
}Compiled for esp32c3 on esp32 3.3.12 with Adafruit BME280 Library 2.3.0 · 3 Nov 2026
How it works
Both modules share one I2C bus: two wires carry data to the BME280 (address 0x76) and the OLED (0x3C). Each listens only to its own address, so they sit on the same SDA and SCL lines.
Every two seconds the ESP32-C3 reads temperature, humidity and pressure and works out the dew point — the temperature at which water condenses on a surface. When the dew point is close to the room temperature, walls and windows sweat; that’s the number to watch in the monsoon.
The SuperMini is tiny but has two catches. Its default I2C pins are strapping pins wired to the LED and the BOOT button, so the build moves I2C to GPIO5 and 6. And its USB port talks to the chip directly, so “USB CDC On Boot” must be on for Serial to reach your computer.
Everything here runs at 3.3 V, so no level shifting is needed.
Troubleshooting
“BME280 not found at 0x76”
Some boards answer at 0x77 — change the address in bme.begin(). If it still fails, check the chip: a BMP280 (no humidity) is often sold as a BME280.
Temperature reads 1–2 °C high
The sensor warms up from the board next to it. Put it on a short cable away from the ESP32 and the OLED.
Nothing on the Serial Monitor
Turn on USB CDC On Boot (Tools menu in the Arduino IDE), then re-upload.
Upgrades
- Send readings to Home Assistant over MQTT.
- Add a buzzer that warns when humidity passes 70 % (mould risk).
- Run on a battery with deep sleep between readings.