Mains voltage (230 V) — can kill. The low-voltage side (board, sensors, display, relay module) is safe to build yourself. The mains side must be wired by a licensed electrician, and tested with the circuit switched off at the MCB.
- Never switch a motor with a relay module. Motors pull several times their running current at start-up; hobby relay contacts weld or overheat. The relay only drives a contactor’s coil (or your pump starter’s coil input).
- Contactor rated for motors (AC-3) at or above the load’s nameplate current.
- Protect and earth: MCB on live, RCCB/ELCB on the circuit, metal bodies earthed. Switch live only — never neutral or earth.
- Keep the two worlds apart: mains and low-voltage wiring in separate compartments of a closed, non-metallic enclosure; no bare 230 V terminals.
- Fail safe: the code switches the load off when a sensor stops answering. Still fit a manual override at the starter.
Parts list
| Part | Qty | Approx. | Buy |
|---|---|---|---|
| ESP32 DevKit V1 (30-pin) | 1 | ₹380 | Buy ESP32 DevKit V1 (30-pin) |
| TM1637 4-digit display module | 1 | ₹70 | Buy TM1637 4-digit display module |
| Push button, panel-mount | 1 | ₹40 | Buy Push button, panel-mount |
| 1-channel relay module, 5 V coil, 3.3 V-trigger (active-LOW) | 1 | ₹70 | Buy 1-channel relay module, 5 V coil, 3.3 V-trigger (active-LOW) |
| Contactor, 230 V AC coil, 25 A AC-1 (2-pole for a 2–3 kW geyser) | 1 | ₹650 | Buy Contactor, 230 V AC coil, 25 A AC-1 (2-pole for a 2–3 kW geyser) |
| Active buzzer module | 1 | ₹25 | Buy Active buzzer module |
| Isolated 5 V 1 A SMPS module or USB adapter | 1 | ₹150 | Buy Isolated 5 V 1 A SMPS module or USB adapter |
| Enclosure outside the bathroom, with separate mains and low-voltage sections | 1 | ₹250 | Buy Enclosure outside the bathroom, with separate mains and low-voltage sections |
| Total | ₹1,635 |
Affiliate disclosure: “Buy” links may earn FlashReady a small commission at no extra cost to you. Prices are indicative.
Wiring
| ESP32 DevKit V1 | Part · pin | Wire | Notes |
|---|---|---|---|
| D18 | TM1637 4-digit 7-segment display · CLK | orange | |
| D19 | TM1637 4-digit 7-segment display · DIO | green | |
| 3V3 | TM1637 4-digit 7-segment display · VCC | red | The TM1637 runs fine on 3.3 V |
| GND | TM1637 4-digit 7-segment display · GND | black | |
| D27 | Push button (6 mm tactile switch) · 1 | purple | Tap = +15 min, hold 2 s = off. INPUT_PULLUP |
| GND | Push button (6 mm tactile switch) · 2 | black | |
| D26 | 1-channel relay module (5 V coil) · IN | orange | Active-LOW; written HIGH (off) before it becomes an output |
| VIN | 1-channel relay module (5 V coil) · DC+ | red | 5 V for the relay coil |
| GND | 1-channel relay module (5 V coil) · DC− | black | |
| Contactor coil circuit, 230 V (electrician) · L | 1-channel relay module (5 V coil) · COM | brown | Live from the geyser’s MCB to COM — 230 V, electrician only |
| Contactor coil circuit, 230 V (electrician) · A1 | 1-channel relay module (5 V coil) · NO | brown | NO to contactor coil A1; A2 to neutral. The contactor’s main contacts feed the geyser. |
| D25 | Active buzzer module (high-level trigger) · I/O | orange | |
| 3V3 | Active buzzer module (high-level trigger) · VCC | red | |
| GND | Active buzzer module (high-level trigger) · GND | black |
Board quirks: A 2 kW geyser draws about 9 A, a 3 kW one 13 A — far too much for the relay module. The relay only switches the coil of a <strong>contactor</strong> rated for the heater (AC-1, 25 A); the contactor carries the geyser current. An electrician wires the contactor, the geyser’s own MCB, a 30 mA RCCB and the earth. Mount the box <strong>outside</strong> the bathroom (the push button too, or use a low-voltage button wired in from outside the splash zone). Nothing from this project goes inside the wet area. Keep the geyser’s own thermostat and safety cut-out. This timer decides how long the geyser may heat; the thermostat still decides how hot the water gets. After a power cut the timer starts in OFF. The geyser never switches itself on.
Code
// Geyser (water heater) auto-off timer — ESP32 DevKit V1 + TM1637 + push button + relay + buzzer
// Relay module IN on D26 (active-LOW): COM/NO switch the COIL of a contactor; the contactor switches
// the geyser. TM1637: CLK D18, DIO D19 at 3V3. Push button D27 to GND. Buzzer module on D25.
// Tap = +15 minutes (up to 60). Hold 2 s = off now. When the time runs out: off + three beeps.
#include <TM1637Display.h>

constexpr uint8_t RELAY_PIN = 26;
constexpr uint8_t BUTTON_PIN = 27;
constexpr uint8_t BUZZER_PIN = 25;
constexpr uint8_t CLK_PIN = 18;
constexpr uint8_t DIO_PIN = 19;
constexpr bool RELAY_ACTIVE_LOW = true;
constexpr uint32_t STEP_MS = 15UL * 60UL * 1000UL;
constexpr uint32_t MAX_MS = 60UL * 60UL * 1000UL;

TM1637Display display(CLK_PIN, DIO_PIN);
const uint8_t OFF_SEGS[] = {0, SEG_A | SEG_B | SEG_C | SEG_D | SEG_E | SEG_F, SEG_A | SEG_E | SEG_F | SEG_G, SEG_A | SEG_E | SEG_F | SEG_G};
uint32_t offAt = 0;  // millis() when the geyser switches off; 0 = off
bool warned = false;

void setGeyser(bool on) {
  digitalWrite(RELAY_PIN, (on != RELAY_ACTIVE_LOW) ? HIGH : LOW);
}

void beep(int n) {
  for (int i = 0; i < n; i++) {
    digitalWrite(BUZZER_PIN, HIGH);
    delay(150);
    digitalWrite(BUZZER_PIN, LOW);
    delay(150);
  }
}

void stop(const char* why) {
  offAt = 0;
  setGeyser(false);
  display.setSegments(OFF_SEGS);
  Serial.printf("Geyser OFF (%s)\n", why);
}

void setup() {
  setGeyser(false);  // before pinMode: the contactor stays off at boot and after a power cut
  pinMode(RELAY_PIN, OUTPUT);
  pinMode(BUTTON_PIN, INPUT_PULLUP);
  pinMode(BUZZER_PIN, OUTPUT);
  Serial.begin(115200);
  display.setBrightness(4);
  stop("power on");
}

void loop() {
  uint32_t now = millis();

  if (digitalRead(BUTTON_PIN) == LOW) {
    uint32_t t0 = now;
    while (digitalRead(BUTTON_PIN) == LOW && millis() - t0 < 2000) delay(10);
    if (millis() - t0 >= 2000) {
      stop("button held");
      beep(1);
    } else {
      uint32_t left = offAt ? offAt - now : 0;
      left = min(left + STEP_MS, MAX_MS);
      offAt = now + left;
      warned = false;
      setGeyser(true);
      Serial.printf("Geyser ON for %lu min\n", left / 60000UL);
      beep(1);
    }
    while (digitalRead(BUTTON_PIN) == LOW) delay(10);
    return;
  }

  if (offAt) {
    int32_t left = (int32_t)(offAt - now);
    if (left <= 0) {
      stop("time up");
      beep(3);  // hot water ready
      return;
    }
    if (left < 60000 && !warned) {
      warned = true;
      beep(1);
    }
    uint32_t s = (left + 999) / 1000;
    display.showNumberDecEx((s / 60) * 100 + s % 60, 0b01000000, true);  // MM:SS
    static uint32_t lastLog = 0;
    if (now - lastLog > 5000) {
      lastLog = now;
      Serial.printf("geyser=ON left=%02lu:%02lu\n", s / 60, s % 60);
    }
  }
  delay(50);
}
// Geyser (water heater) auto-off timer — ESP32 DevKit V1 + TM1637 + push button + relay + buzzer
// Relay module IN on D26 (active-LOW): COM/NO switch the COIL of a contactor; the contactor switches
// the geyser. TM1637: CLK D18, DIO D19 at 3V3. Push button D27 to GND. Buzzer module on D25.
// Tap = +15 minutes (up to 60). Hold 2 s = off now. When the time runs out: off + three beeps.
#include <TM1637Display.h>
constexpr uint8_t RELAY_PIN = 26;
constexpr uint8_t BUTTON_PIN = 27;
constexpr uint8_t BUZZER_PIN = 25;
constexpr uint8_t CLK_PIN = 18;
constexpr uint8_t DIO_PIN = 19;
constexpr bool RELAY_ACTIVE_LOW = true;
constexpr uint32_t STEP_MS = 15UL * 60UL * 1000UL;
constexpr uint32_t MAX_MS = 60UL * 60UL * 1000UL;
TM1637Display display(CLK_PIN, DIO_PIN);
const uint8_t OFF_SEGS[] = {0, SEG_A | SEG_B | SEG_C | SEG_D | SEG_E | SEG_F, SEG_A | SEG_E | SEG_F | SEG_G, SEG_A | SEG_E | SEG_F | SEG_G};
uint32_t offAt = 0; // millis() when the geyser switches off; 0 = off
bool warned = false;
void setGeyser(bool on) {
digitalWrite(RELAY_PIN, (on != RELAY_ACTIVE_LOW) ? HIGH : LOW);
}
void beep(int n) {
for (int i = 0; i < n; i++) {
digitalWrite(BUZZER_PIN, HIGH);
delay(150);
digitalWrite(BUZZER_PIN, LOW);
delay(150);
}
}
void stop(const char* why) {
offAt = 0;
setGeyser(false);
display.setSegments(OFF_SEGS);
Serial.printf("Geyser OFF (%s)\n", why);
}
void setup() {
setGeyser(false); // before pinMode: the contactor stays off at boot and after a power cut
pinMode(RELAY_PIN, OUTPUT);
pinMode(BUTTON_PIN, INPUT_PULLUP);
pinMode(BUZZER_PIN, OUTPUT);
Serial.begin(115200);
display.setBrightness(4);
stop("power on");
}
void loop() {
uint32_t now = millis();
if (digitalRead(BUTTON_PIN) == LOW) {
uint32_t t0 = now;
while (digitalRead(BUTTON_PIN) == LOW && millis() - t0 < 2000) delay(10);
if (millis() - t0 >= 2000) {
stop("button held");
beep(1);
} else {
uint32_t left = offAt ? offAt - now : 0;
left = min(left + STEP_MS, MAX_MS);
offAt = now + left;
warned = false;
setGeyser(true);
Serial.printf("Geyser ON for %lu min\n", left / 60000UL);
beep(1);
}
while (digitalRead(BUTTON_PIN) == LOW) delay(10);
return;
}
if (offAt) {
int32_t left = (int32_t)(offAt - now);
if (left <= 0) {
stop("time up");
beep(3); // hot water ready
return;
}
if (left < 60000 && !warned) {
warned = true;
beep(1);
}
uint32_t s = (left + 999) / 1000;
display.showNumberDecEx((s / 60) * 100 + s % 60, 0b01000000, true); // MM:SS
static uint32_t lastLog = 0;
if (now - lastLog > 5000) {
lastLog = now;
Serial.printf("geyser=ON left=%02lu:%02lu\n", s / 60, s % 60);
}
}
delay(50);
}Compiled for esp32 on esp32 3.3.12 with TM1637 1.2.0 · 3 Nov 2026
How it works
“Who left the geyser on?” is a daily question in many Indian homes. A 2 kW geyser left on all morning wastes 3–4 units a day — and old geysers with a failed thermostat can overheat dangerously. This timer replaces the plain switch with press for 15 minutes: the geyser heats, the display counts down, and it switches off by itself.
How it works
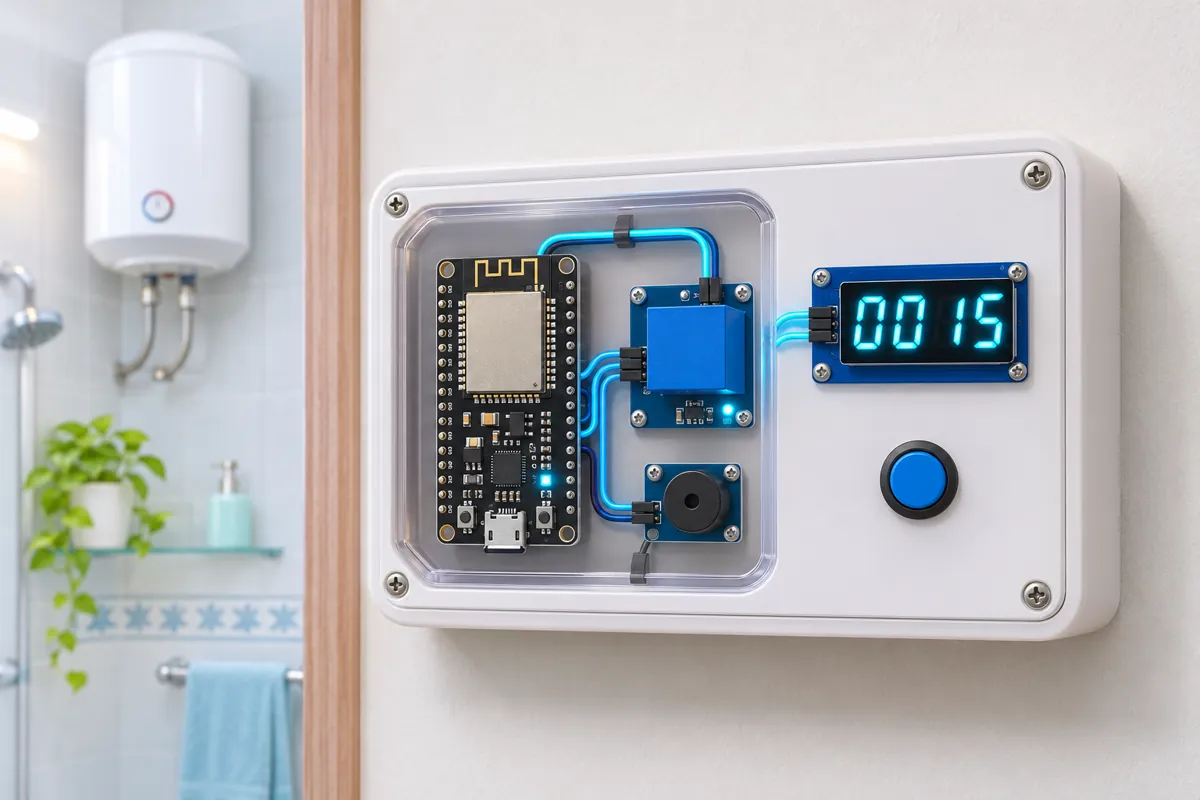
Tap the button and the timer adds 15 minutes (up to 60). The ESP32 closes the relay, which energises the contactor’s coil; the contactor’s heavy contacts switch the geyser. The TM1637 shows the time left as MM:SS.
One minute before the end it beeps once; at zero it opens the relay and beeps three times — hot water ready. Holding the button for 2 seconds switches off at once.
The relay pin is written HIGH (off) before it becomes an output, so the geyser stays off when the ESP32 boots — after a power cut, the geyser waits for someone to press the button.
Why these parts
- Contactor — the only correct way to switch a 9–13 A heater from a small relay module. Two-pole contactors switch live and neutral.
- TM1637 — a countdown is easier to read from the doorway than a status LED, and it runs on 3.3 V.
- ESP32 — leaves room to add Wi-Fi schedules later; a Nano would work for the timer alone.
Choosing the time
A 15 L geyser heats tap water by about 30 °C in 15–20 minutes at 2 kW; a 25 L one takes 25–30 minutes. Change STEP_MS if your family always needs 20 minutes.
India notes
Geyser electrocutions happen every winter in India, almost always from missing earthing or no RCCB. Before adding any automation, have an electrician confirm the geyser circuit has a proper earth and a 30 mA RCCB. This project must never replace those.
Troubleshooting
The display shows OFF and nothing happens when I press
Check the button is between D27 and GND. The Serial Monitor (115200) prints “Geyser ON for 15 min” on each tap.
The relay clicks but the geyser doesn’t heat
Have the electrician check that the relay contact actually feeds the contactor coil (it should pull in with a clunk) and that the geyser’s own switch and thermostat are on.
The ESP32 resets when the contactor switches
Coil switching noise. Ask the electrician to fit an RC snubber across the contactor coil, keep low-voltage wires away from the 230 V side, and power the ESP32 from its own isolated supply.
Upgrades
- Add Wi-Fi and NTP time to switch on automatically at 6:00 on weekdays for 20 minutes.
- Strap a DS18B20 to the hot-water outlet pipe and beep when the outlet is above 45 °C.
- Add a PZEM-004T to count the units each bath costs.