Parts list
| Part | Qty | Approx. | Buy |
|---|---|---|---|
| Arduino Uno R3 (CH340 clone) | 1 | ₹450 | Buy Arduino Uno R3 (CH340 clone) |
| 16x2 LCD with I2C backpack (PCF8574, 0x27) | 1 | ₹180 | Buy 16x2 LCD with I2C backpack (PCF8574, 0x27) |
| Push button 12 mm with cap (candidates) | 4 | ₹60 | Buy Push button 12 mm with cap (candidates) |
| Tactile push button (BALLOT, RESULT) | 2 | ₹6 | Buy Tactile push button (BALLOT, RESULT) |
| Active buzzer module | 1 | ₹25 | Buy Active buzzer module |
| 6-core cable between the voting box and the officer’s box (2 m) | 1 | ₹80 | Buy 6-core cable between the voting box and the officer’s box (2 m) |
| Two small project boxes or cardboard boxes | 2 | ₹120 | Buy Two small project boxes or cardboard boxes |
| Jumper wires | 1 | ₹30 | Buy Jumper wires |
| Total | ₹951 |
Affiliate disclosure: “Buy” links may earn FlashReady a small commission at no extra cost to you. Prices are indicative.
Wiring
| Arduino Uno R3 | Part · pin | Wire | Notes |
|---|---|---|---|
| D2 | Push button (6 mm tactile switch) · 1 | orange | Candidate 1 — internal pull-up |
| GND | Push button (6 mm tactile switch) · 2 | black | |
| D3 | Push button (6 mm tactile switch) #2 · 1 | orange | Candidate 2 |
| GND | Push button (6 mm tactile switch) #2 · 2 | black | |
| D4 | Push button (6 mm tactile switch) #3 · 1 | orange | Candidate 3 |
| GND | Push button (6 mm tactile switch) #3 · 2 | black | |
| D5 | Push button (6 mm tactile switch) #4 · 1 | orange | Candidate 4 (NOTA) |
| GND | Push button (6 mm tactile switch) #4 · 2 | black | |
| D6 | Push button (6 mm tactile switch) #5 · 1 | purple | BALLOT — on the officer’s control box |
| GND | Push button (6 mm tactile switch) #5 · 2 | black | |
| D7 | Push button (6 mm tactile switch) #6 · 1 | brown | RESULT — on the officer’s control box |
| GND | Push button (6 mm tactile switch) #6 · 2 | black | |
| A4 | 16×2 LCD + I2C backpack · SDA | blue | |
| A5 | 16×2 LCD + I2C backpack · SCL | yellow | |
| 5V | 16×2 LCD + I2C backpack · VCC | red | |
| GND | 16×2 LCD + I2C backpack · GND | black | |
| D8 | Active buzzer module (high-level trigger) · I/O | green | |
| 5V | Active buzzer module (high-level trigger) · VCC | red | |
| GND | Active buzzer module (high-level trigger) · GND | black |
Board quirks: This is a classroom demonstration of how an electronic voting machine works — for class-monitor or house-captain elections in school. It is not, and must never be presented as, a real election device. Change the names in the NAME[] list before the election (up to 9 letters each). The fourth button is NOTA, as on the real machine’s ballot unit. Votes live in the Uno’s EEPROM (bytes 0–8), so unplugging it or a power cut never loses them. Re-uploading the sketch keeps them too; only BALLOT + RESULT held for 5 s clears them. The sketch never prints which candidate received a vote — only the running total — so a laptop watching the Serial Monitor can’t break the secret ballot. If your LCD stays blank but lights up, its backpack may be at 0x3F instead of 0x27: change the address in the sketch. Turn the blue contrast pot on the backpack if you see only blocks.
Code
// Classroom voting machine (a model of an EVM for class elections) — Arduino Uno + 16x2 I2C LCD.
// Like the real thing, the presiding officer enables ONE vote at a time with the BALLOT button;
// the voter then presses one candidate button and a long beep confirms it. Votes are kept in
// EEPROM, so a power cut doesn't lose them. Hold RESULT for 3 s to show the count.
// Hold BALLOT + RESULT together for 5 s to clear all votes (new election).
// Candidates D2–D5 (to GND), BALLOT D6, RESULT D7, buzzer module I/O D8, LCD on SDA/SCL (A4/A5).
// A classroom demonstration only — not a real election device.
#include <Wire.h>
#include <EEPROM.h>
#include <LiquidCrystal_I2C.h>

constexpr uint8_t CANDIDATES = 4;
constexpr uint8_t CAND_PIN[CANDIDATES] = {2, 3, 4, 5};
constexpr uint8_t BALLOT_PIN = 6, RESULT_PIN = 7, BUZZER_PIN = 8;
// Up to 9 characters each so "name 123" fits a 16-character line twice.
const char* const NAME[CANDIDATES] = {"Aarav", "Diya", "Kabir", "NOTA"};
constexpr uint8_t MAGIC = 0xE7;  // EEPROM byte 0: marks the vote store as initialised

LiquidCrystal_I2C lcd(0x27, 16, 2);
uint16_t votes[CANDIDATES];
bool ballotOpen = false;

bool down(uint8_t pin) { return digitalRead(pin) == LOW; }

void beep(unsigned int ms) {
  digitalWrite(BUZZER_PIN, HIGH);
  delay(ms);
  digitalWrite(BUZZER_PIN, LOW);
}

void show(const __FlashStringHelper* a, const __FlashStringHelper* b) {
  lcd.clear();
  lcd.print(a);
  lcd.setCursor(0, 1);
  lcd.print(b);
}

void saveVotes() {
  EEPROM.update(0, MAGIC);
  EEPROM.put(1, votes);
}

uint16_t total() {
  uint16_t t = 0;
  for (uint8_t i = 0; i < CANDIDATES; i++) t += votes[i];
  return t;
}

void idleScreen() {
  lcd.clear();
  lcd.print(F("Votes cast: "));
  lcd.print(total());
  lcd.setCursor(0, 1);
  lcd.print(F("Officer: BALLOT"));
}

// Wait until every button is released, so one press never counts twice.
void waitRelease() {
  for (;;) {
    bool any = down(BALLOT_PIN) || down(RESULT_PIN);
    for (uint8_t i = 0; i < CANDIDATES; i++) any |= down(CAND_PIN[i]);
    if (!any) break;
  }
  delay(40);
}

// True if `pin` (and `also`, when given) stay pressed for `ms`.
bool held(uint8_t pin, uint8_t also, unsigned long ms) {
  unsigned long t0 = millis();
  while (down(pin) && (also == 0xFF || down(also))) {
    if (millis() - t0 >= ms) return true;
  }
  return false;
}

void showResult() {
  Serial.println(F("--- Result ---"));
  uint8_t lead = 0;
  bool tie = false;
  for (uint8_t i = 0; i < CANDIDATES; i++) {
    Serial.print(NAME[i]);
    Serial.print(F(": "));
    Serial.println(votes[i]);
    if (i && votes[i] > votes[lead]) lead = i, tie = false;
    else if (i && votes[i] == votes[lead]) tie = true;
  }
  // Two candidates per screen, 3 s each, then the outcome.
  for (uint8_t i = 0; i < CANDIDATES; i += 2) {
    lcd.clear();
    for (uint8_t r = 0; r < 2 && i + r < CANDIDATES; r++) {
      lcd.setCursor(0, r);
      lcd.print(NAME[i + r]);
      lcd.setCursor(11, r);
      lcd.print(votes[i + r]);
    }
    delay(3000);
  }
  lcd.clear();
  if (total() == 0) lcd.print(F("No votes yet"));
  else if (tie) lcd.print(F("Result: TIE"));
  else {
    lcd.print(F("Leading:"));
    lcd.setCursor(0, 1);
    lcd.print(NAME[lead]);
  }
  Serial.println(total() == 0 ? F("No votes yet") : tie ? F("Tie at the top") : F("Leader shown on the LCD"));
  delay(3000);
  idleScreen();
}

void setup() {
  for (uint8_t i = 0; i < CANDIDATES; i++) pinMode(CAND_PIN[i], INPUT_PULLUP);
  pinMode(BALLOT_PIN, INPUT_PULLUP);
  pinMode(RESULT_PIN, INPUT_PULLUP);
  pinMode(BUZZER_PIN, OUTPUT);
  Serial.begin(115200);
  Serial.println(F("Classroom voting machine (demo model)"));
  lcd.init();
  lcd.backlight();
  if (EEPROM.read(0) == MAGIC) EEPROM.get(1, votes);
  else {
    memset(votes, 0, sizeof votes);
    saveVotes();
  }
  show(F("Class election"), F("Voting machine"));
  delay(1500);
  Serial.print(F("Votes stored: "));
  Serial.println(total());
  idleScreen();
}

void loop() {
  // Clear all votes: BALLOT + RESULT held together for 5 s.
  if (down(BALLOT_PIN) && down(RESULT_PIN)) {
    show(F("Keep holding to"), F("CLEAR all votes"));
    if (held(BALLOT_PIN, RESULT_PIN, 5000)) {
      memset(votes, 0, sizeof votes);
      saveVotes();
      ballotOpen = false;
      show(F("All votes"), F("cleared"));
      Serial.println(F("All votes cleared — new election"));
      beep(600);
      delay(1500);
    }
    waitRelease();
    idleScreen();
    return;
  }

  if (down(RESULT_PIN)) {
    if (held(RESULT_PIN, 0xFF, 3000) && !ballotOpen) {
      waitRelease();
      showResult();
    } else waitRelease();
    return;
  }

  if (down(BALLOT_PIN) && !ballotOpen) {
    delay(60);
    if (down(BALLOT_PIN) && !down(RESULT_PIN)) {
      ballotOpen = true;
      show(F("BALLOT ready"), F("Press one button"));
      beep(80);
      waitRelease();
    }
    return;
  }

  for (uint8_t i = 0; i < CANDIDATES; i++) {
    if (!down(CAND_PIN[i])) continue;
    if (!ballotOpen) {
      show(F("Wait for the"), F("officer (BALLOT)"));
      waitRelease();
      delay(1000);
      idleScreen();
      return;
    }
    ballotOpen = false;  // one vote per BALLOT press
    votes[i]++;
    saveVotes();
    show(F("Vote recorded"), F("Thank you"));
    beep(1000);  // the long beep voters know from the real EVM
    // Secret ballot: only the running total is printed, never who got this vote.
    Serial.print(F("Vote recorded. Total: "));
    Serial.println(total());
    waitRelease();
    delay(800);
    idleScreen();
    return;
  }
}
// Classroom voting machine (a model of an EVM for class elections) — Arduino Uno + 16x2 I2C LCD.
// Like the real thing, the presiding officer enables ONE vote at a time with the BALLOT button;
// the voter then presses one candidate button and a long beep confirms it. Votes are kept in
// EEPROM, so a power cut doesn't lose them. Hold RESULT for 3 s to show the count.
// Hold BALLOT + RESULT together for 5 s to clear all votes (new election).
// Candidates D2–D5 (to GND), BALLOT D6, RESULT D7, buzzer module I/O D8, LCD on SDA/SCL (A4/A5).
// A classroom demonstration only — not a real election device.
#include <Wire.h>
#include <EEPROM.h>
#include <LiquidCrystal_I2C.h>
constexpr uint8_t CANDIDATES = 4;
constexpr uint8_t CAND_PIN[CANDIDATES] = {2, 3, 4, 5};
constexpr uint8_t BALLOT_PIN = 6, RESULT_PIN = 7, BUZZER_PIN = 8;
// Up to 9 characters each so "name 123" fits a 16-character line twice.
const char* const NAME[CANDIDATES] = {"Aarav", "Diya", "Kabir", "NOTA"};
constexpr uint8_t MAGIC = 0xE7; // EEPROM byte 0: marks the vote store as initialised
LiquidCrystal_I2C lcd(0x27, 16, 2);
uint16_t votes[CANDIDATES];
bool ballotOpen = false;
bool down(uint8_t pin) { return digitalRead(pin) == LOW; }
void beep(unsigned int ms) {
digitalWrite(BUZZER_PIN, HIGH);
delay(ms);
digitalWrite(BUZZER_PIN, LOW);
}
void show(const __FlashStringHelper* a, const __FlashStringHelper* b) {
lcd.clear();
lcd.print(a);
lcd.setCursor(0, 1);
lcd.print(b);
}
void saveVotes() {
EEPROM.update(0, MAGIC);
EEPROM.put(1, votes);
}
uint16_t total() {
uint16_t t = 0;
for (uint8_t i = 0; i < CANDIDATES; i++) t += votes[i];
return t;
}
void idleScreen() {
lcd.clear();
lcd.print(F("Votes cast: "));
lcd.print(total());
lcd.setCursor(0, 1);
lcd.print(F("Officer: BALLOT"));
}
// Wait until every button is released, so one press never counts twice.
void waitRelease() {
for (;;) {
bool any = down(BALLOT_PIN) || down(RESULT_PIN);
for (uint8_t i = 0; i < CANDIDATES; i++) any |= down(CAND_PIN[i]);
if (!any) break;
}
delay(40);
}
// True if `pin` (and `also`, when given) stay pressed for `ms`.
bool held(uint8_t pin, uint8_t also, unsigned long ms) {
unsigned long t0 = millis();
while (down(pin) && (also == 0xFF || down(also))) {
if (millis() - t0 >= ms) return true;
}
return false;
}
void showResult() {
Serial.println(F("--- Result ---"));
uint8_t lead = 0;
bool tie = false;
for (uint8_t i = 0; i < CANDIDATES; i++) {
Serial.print(NAME[i]);
Serial.print(F(": "));
Serial.println(votes[i]);
if (i && votes[i] > votes[lead]) lead = i, tie = false;
else if (i && votes[i] == votes[lead]) tie = true;
}
// Two candidates per screen, 3 s each, then the outcome.
for (uint8_t i = 0; i < CANDIDATES; i += 2) {
lcd.clear();
for (uint8_t r = 0; r < 2 && i + r < CANDIDATES; r++) {
lcd.setCursor(0, r);
lcd.print(NAME[i + r]);
lcd.setCursor(11, r);
lcd.print(votes[i + r]);
}
delay(3000);
}
lcd.clear();
if (total() == 0) lcd.print(F("No votes yet"));
else if (tie) lcd.print(F("Result: TIE"));
else {
lcd.print(F("Leading:"));
lcd.setCursor(0, 1);
lcd.print(NAME[lead]);
}
Serial.println(total() == 0 ? F("No votes yet") : tie ? F("Tie at the top") : F("Leader shown on the LCD"));
delay(3000);
idleScreen();
}
void setup() {
for (uint8_t i = 0; i < CANDIDATES; i++) pinMode(CAND_PIN[i], INPUT_PULLUP);
pinMode(BALLOT_PIN, INPUT_PULLUP);
pinMode(RESULT_PIN, INPUT_PULLUP);
pinMode(BUZZER_PIN, OUTPUT);
Serial.begin(115200);
Serial.println(F("Classroom voting machine (demo model)"));
lcd.init();
lcd.backlight();
if (EEPROM.read(0) == MAGIC) EEPROM.get(1, votes);
else {
memset(votes, 0, sizeof votes);
saveVotes();
}
show(F("Class election"), F("Voting machine"));
delay(1500);
Serial.print(F("Votes stored: "));
Serial.println(total());
idleScreen();
}
void loop() {
// Clear all votes: BALLOT + RESULT held together for 5 s.
if (down(BALLOT_PIN) && down(RESULT_PIN)) {
show(F("Keep holding to"), F("CLEAR all votes"));
if (held(BALLOT_PIN, RESULT_PIN, 5000)) {
memset(votes, 0, sizeof votes);
saveVotes();
ballotOpen = false;
show(F("All votes"), F("cleared"));
Serial.println(F("All votes cleared — new election"));
beep(600);
delay(1500);
}
waitRelease();
idleScreen();
return;
}
if (down(RESULT_PIN)) {
if (held(RESULT_PIN, 0xFF, 3000) && !ballotOpen) {
waitRelease();
showResult();
} else waitRelease();
return;
}
if (down(BALLOT_PIN) && !ballotOpen) {
delay(60);
if (down(BALLOT_PIN) && !down(RESULT_PIN)) {
ballotOpen = true;
show(F("BALLOT ready"), F("Press one button"));
beep(80);
waitRelease();
}
return;
}
for (uint8_t i = 0; i < CANDIDATES; i++) {
if (!down(CAND_PIN[i])) continue;
if (!ballotOpen) {
show(F("Wait for the"), F("officer (BALLOT)"));
waitRelease();
delay(1000);
idleScreen();
return;
}
ballotOpen = false; // one vote per BALLOT press
votes[i]++;
saveVotes();
show(F("Vote recorded"), F("Thank you"));
beep(1000); // the long beep voters know from the real EVM
// Secret ballot: only the running total is printed, never who got this vote.
Serial.print(F("Vote recorded. Total: "));
Serial.println(total());
waitRelease();
delay(800);
idleScreen();
return;
}
}Compiled for uno on avr 1.8.8 with LiquidCrystal I2C 1.1.2 · 3 Nov 2026
How it works
India votes on electronic voting machines, and a working model is one of the most popular school exhibition projects — and genuinely useful for class-monitor and house-captain elections. This one copies the real machine’s most important rule: the presiding officer enables one vote at a time.
How it works
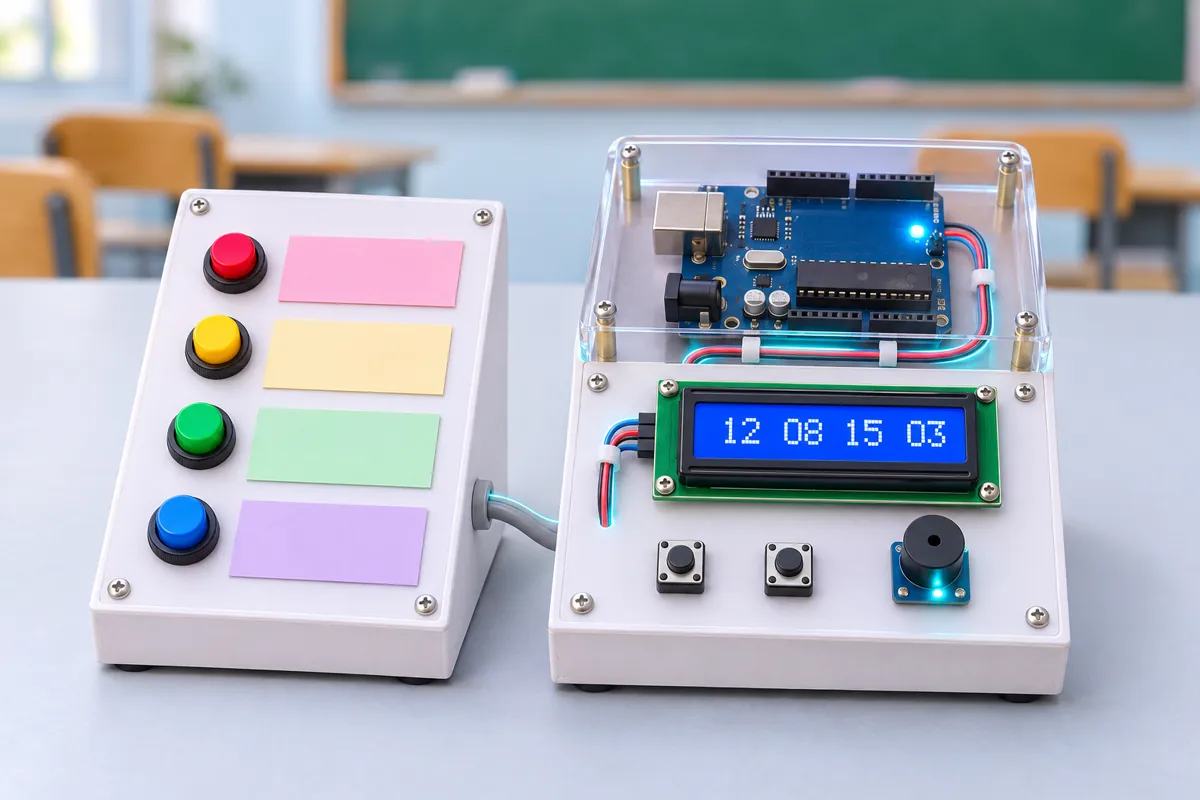
The build has two boxes, like a real EVM: a ballot unit with four candidate buttons (the fourth is NOTA), and the officer’s control unit with BALLOT, RESULT, the LCD and the buzzer.
- The LCD shows the number of votes cast and “Officer: BALLOT”.
- The officer presses BALLOT. The LCD says “BALLOT ready”.
- The voter presses one candidate button. The Uno adds one to that candidate, saves the counts to EEPROM, and sounds a one-second beep — the same confirmation voters hear in a real polling booth.
- Any further presses are ignored until the officer presses BALLOT again.
Holding RESULT for 3 seconds shows each candidate’s count, two per screen, then the leader (or “TIE”). Holding BALLOT and RESULT together for 5 seconds clears everything for a new election.
What to show at the exhibition
Run a mini election with visitors: one of you is the officer, a visitor votes behind a cardboard screen, everyone hears the beep. Show that pressing twice doesn’t add two votes, and that pulling the USB cable out and back in keeps every vote. End with RESULT.
Questions the examiner may ask
- How do you stop someone voting twice? Each BALLOT press allows exactly one vote; the sketch closes the ballot at the first candidate press and waits for all buttons to be released.
- Where are votes stored, and why there? In EEPROM — non-volatile memory inside the ATmega328P that keeps data without power.
EEPROM.update()only writes bytes that changed, which spares its 100,000-write life. - How is the vote kept secret? Nothing that identifies the chosen candidate is printed or displayed at the moment of voting — only the total.
- How is this different from a real EVM? Real machines use one-time-programmable chips, sealed hardware, a VVPAT printer and strict procedures. This model shows the idea, not the security.
Cost in India
About ₹900 with cardboard boxes. The LCD with its I2C backpack is the largest item (₹150–220); buying it with the backpack already soldered saves 12 wires.
Troubleshooting
Pressing a candidate says “Wait for the officer”
That is correct behaviour: each vote must be enabled with BALLOT first, exactly like the control unit of a real EVM.
One press counted two votes
It can’t: BALLOT is cleared at the first candidate press and the sketch waits for every button to be released. If counts still jump, a candidate button is wired to the wrong pair of legs and is always closed.
RESULT does nothing
Hold it for a full 3 seconds, and not while a ballot is open (cast the vote or reset the board first).
Upgrades
- Add an LED next to each candidate button that lights while their vote is being recorded, like the real ballot unit.
- Print a paper slip for each vote on a small thermal printer — a model of VVPAT.
- Add a CLOSE button so results can only be shown after polling ends, and lock further votes.
- Use a 4x4 keypad for up to 15 candidates and a 20x4 LCD for longer names.